Halloween is around the corner and now is the perfect time for a fun little project. Not only can the kids help you with this one, but you will love the simplicity and most of all, the very small price tag!
Window Decorations
Sometimes the simplest ideas make the most powerful statements, and this is one of the easiest projects ever.
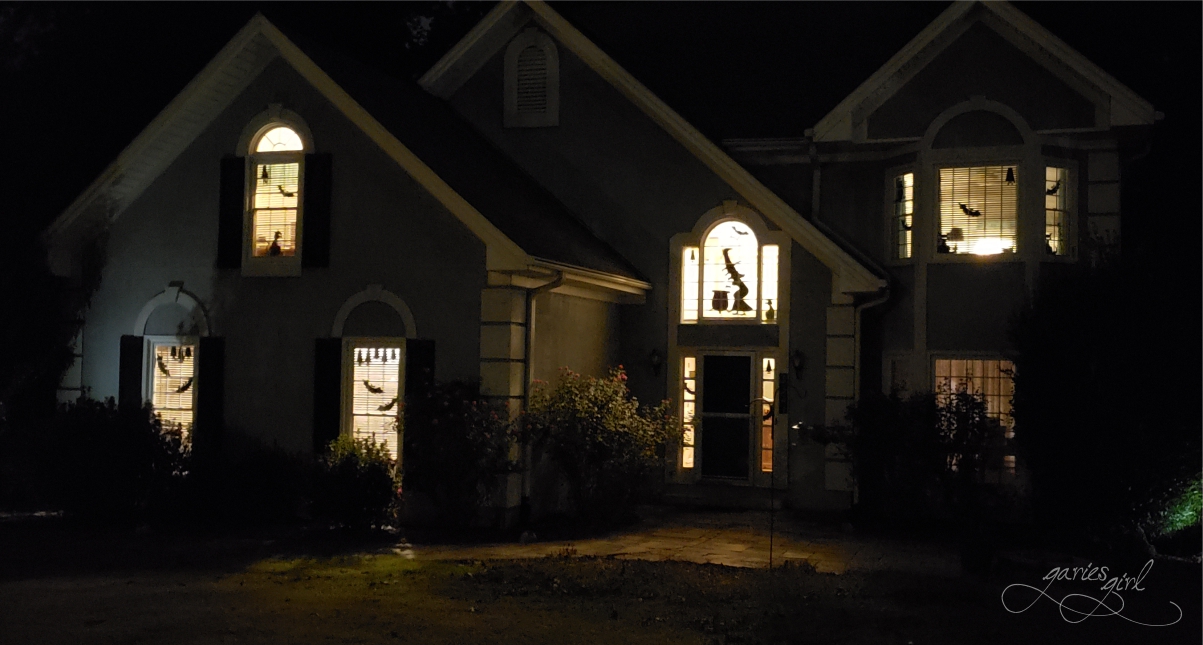
For this project, we are going to cut shapes out of black paper and fix them to the inside of our windows with regular old sticky tape, creating some spooky silhouettes. I recommend a mix of designs for your windows with one larger design for a bigger or more prominent window. Of course, this will completely depend on your house and your window size and placement.
I’m sticking to bats and cats for my bedroom windows, but I wanted something different for the big window in the foyer. This is where I displayed my “hanging guy” for the past three years and it is time to change it up a bit.
Supplies
- Black Poster Board
- Sticky Tape
- Scissors
- White Pencil
I prefer thicker paper for my cutouts. You can pick up black poster boards from any store, but I like the affordable Dollar Tree option. They also sell sticky tape if you’ve run out and need to pick up some more 😉
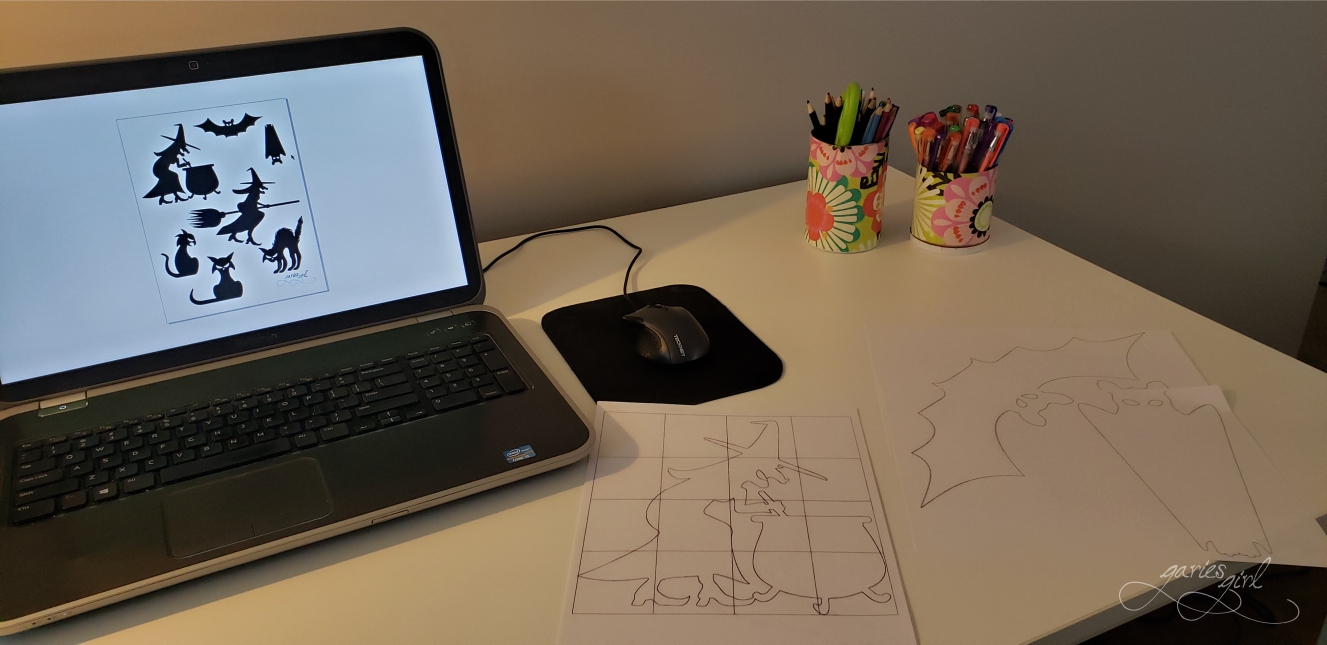
Finding Template Designs
The best way to get started is to find a clipart design on the internet and print it. I’ve created a few designs for myself and would be happy to share them with you. Here is a link to my PDF file:
Larger images can be printed on multiple sheets of printer paper and taped back together. Cut to the outline of your design and you have a reusable template. Once you have your first black paper cut out, you can use it instead to trace more shapes.
Tracing your Designs
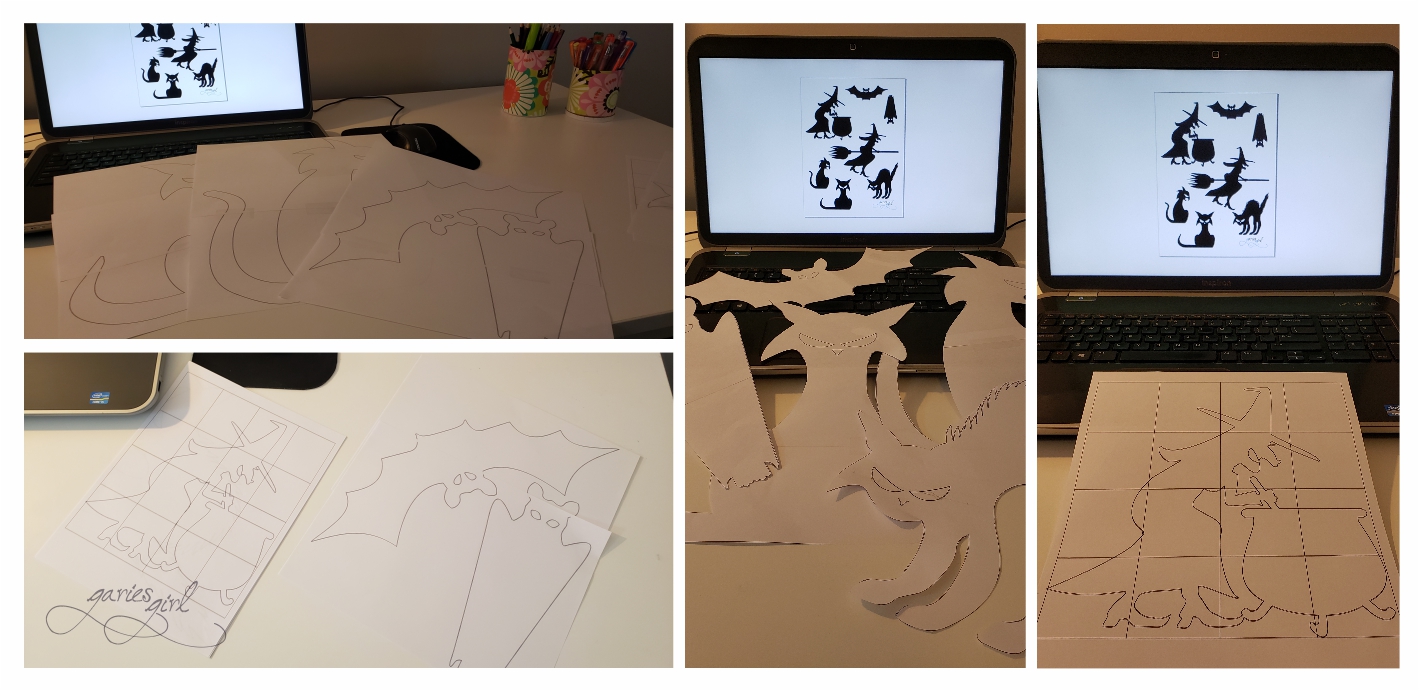
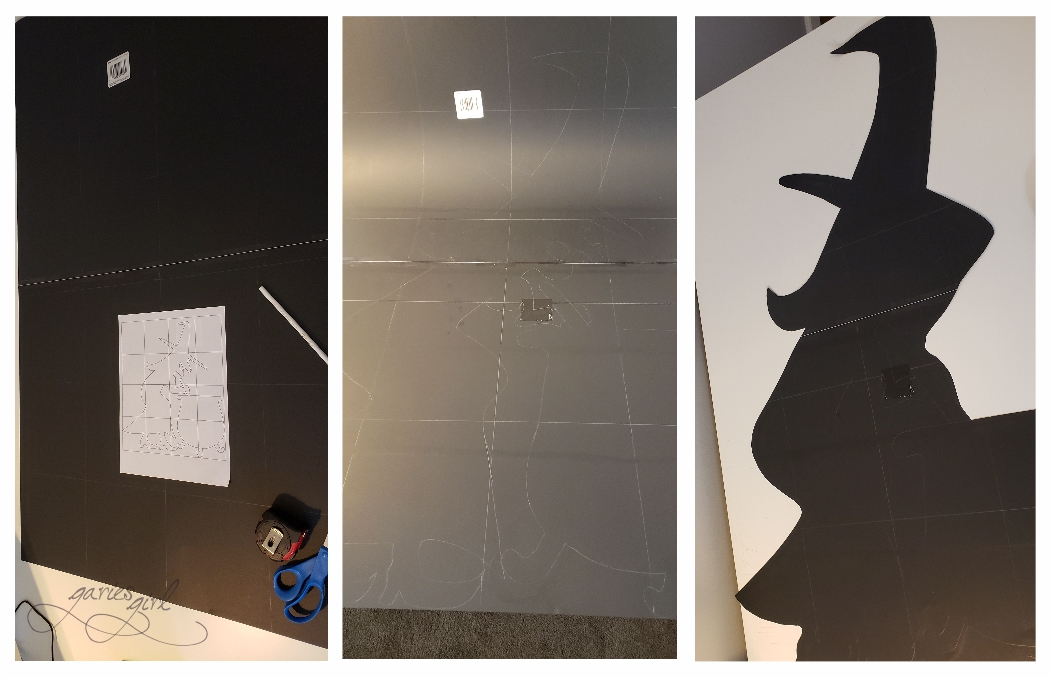
Place your template on the black poster board, hold it in place, and trace your design with a white pencil. Once you’ve traced all your designs the only thing left to do is to start cutting. I don’t like wasting money or material, so I will turn and re-position my templates to get as many shapes per poster as possible. I will even squeeze in half images if I see open space. As an added bonus, you don’t have to be super precise – your outline can be bigger than the template too. The template is really meant as a rough guide.
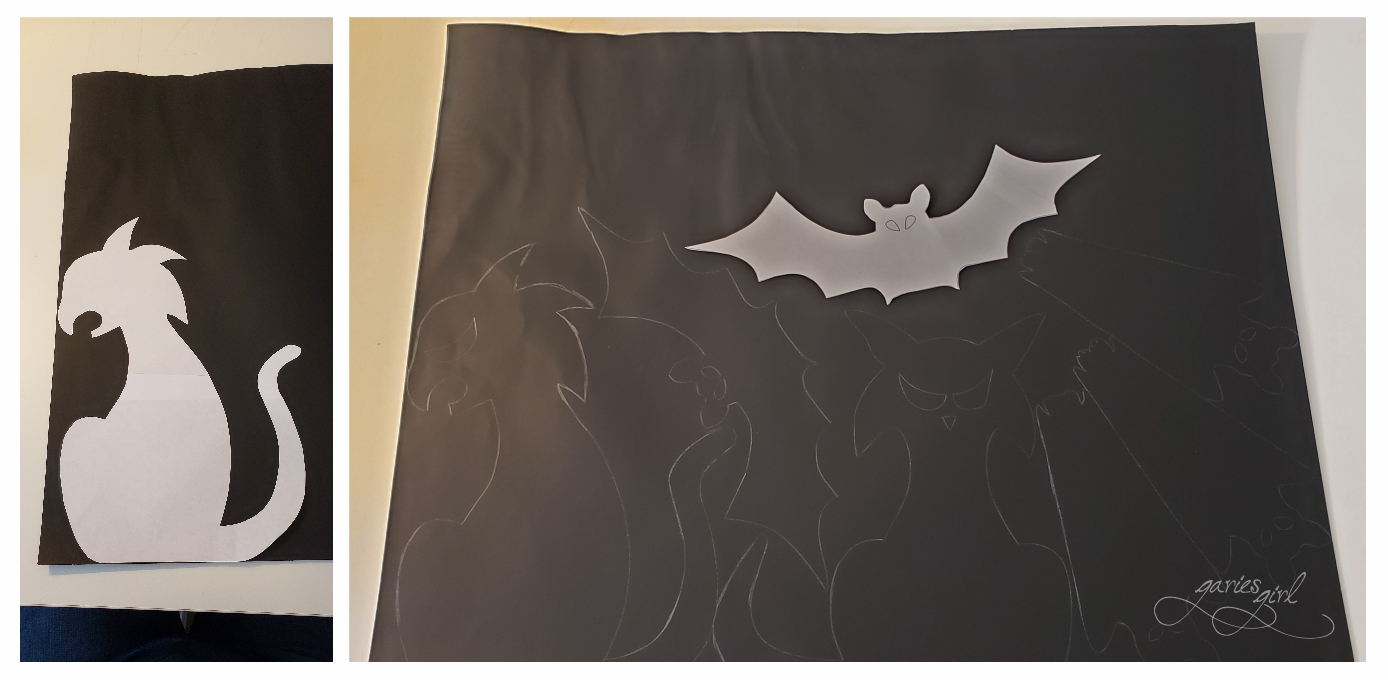
Larger images work slightly differently. Since I didn’t want to pay to have mine printed full size elsewhere, I created a grid pattern and used this as a reference on my poster board. I drew the grid first and sketched the image outlines in each grid freehand. It is a little more complicated but definitely doable.
Fixing the Shapes to the Windows
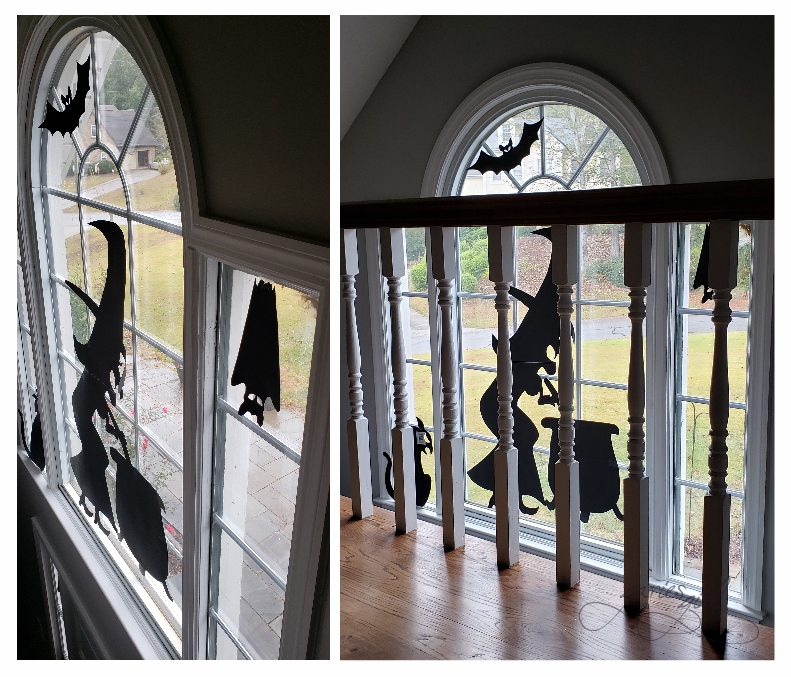
Now comes the fun part when you can play around with the combination and placement of your shapes. Place them in your preferred spot and fix them in place with sticky tape. Flip the shapes to have some mirror images for variation. I even added shapes on the inside of my front door! I like how it ties in with the rest of my foyer decorations.
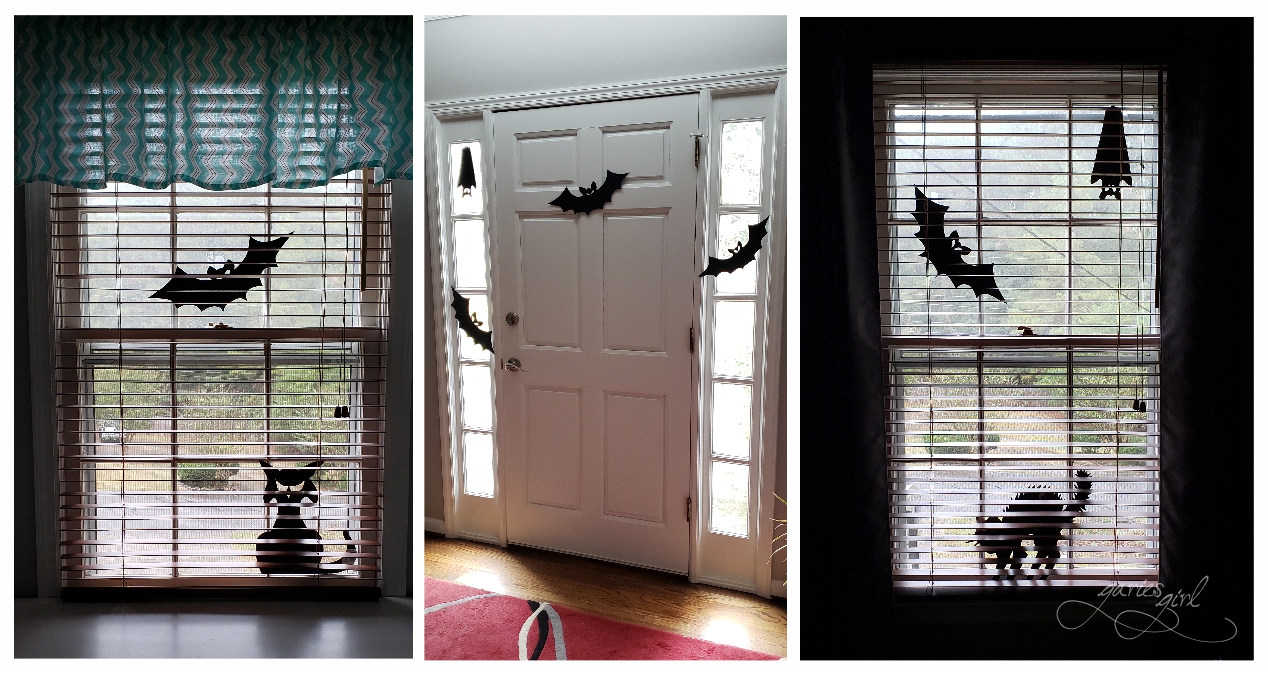
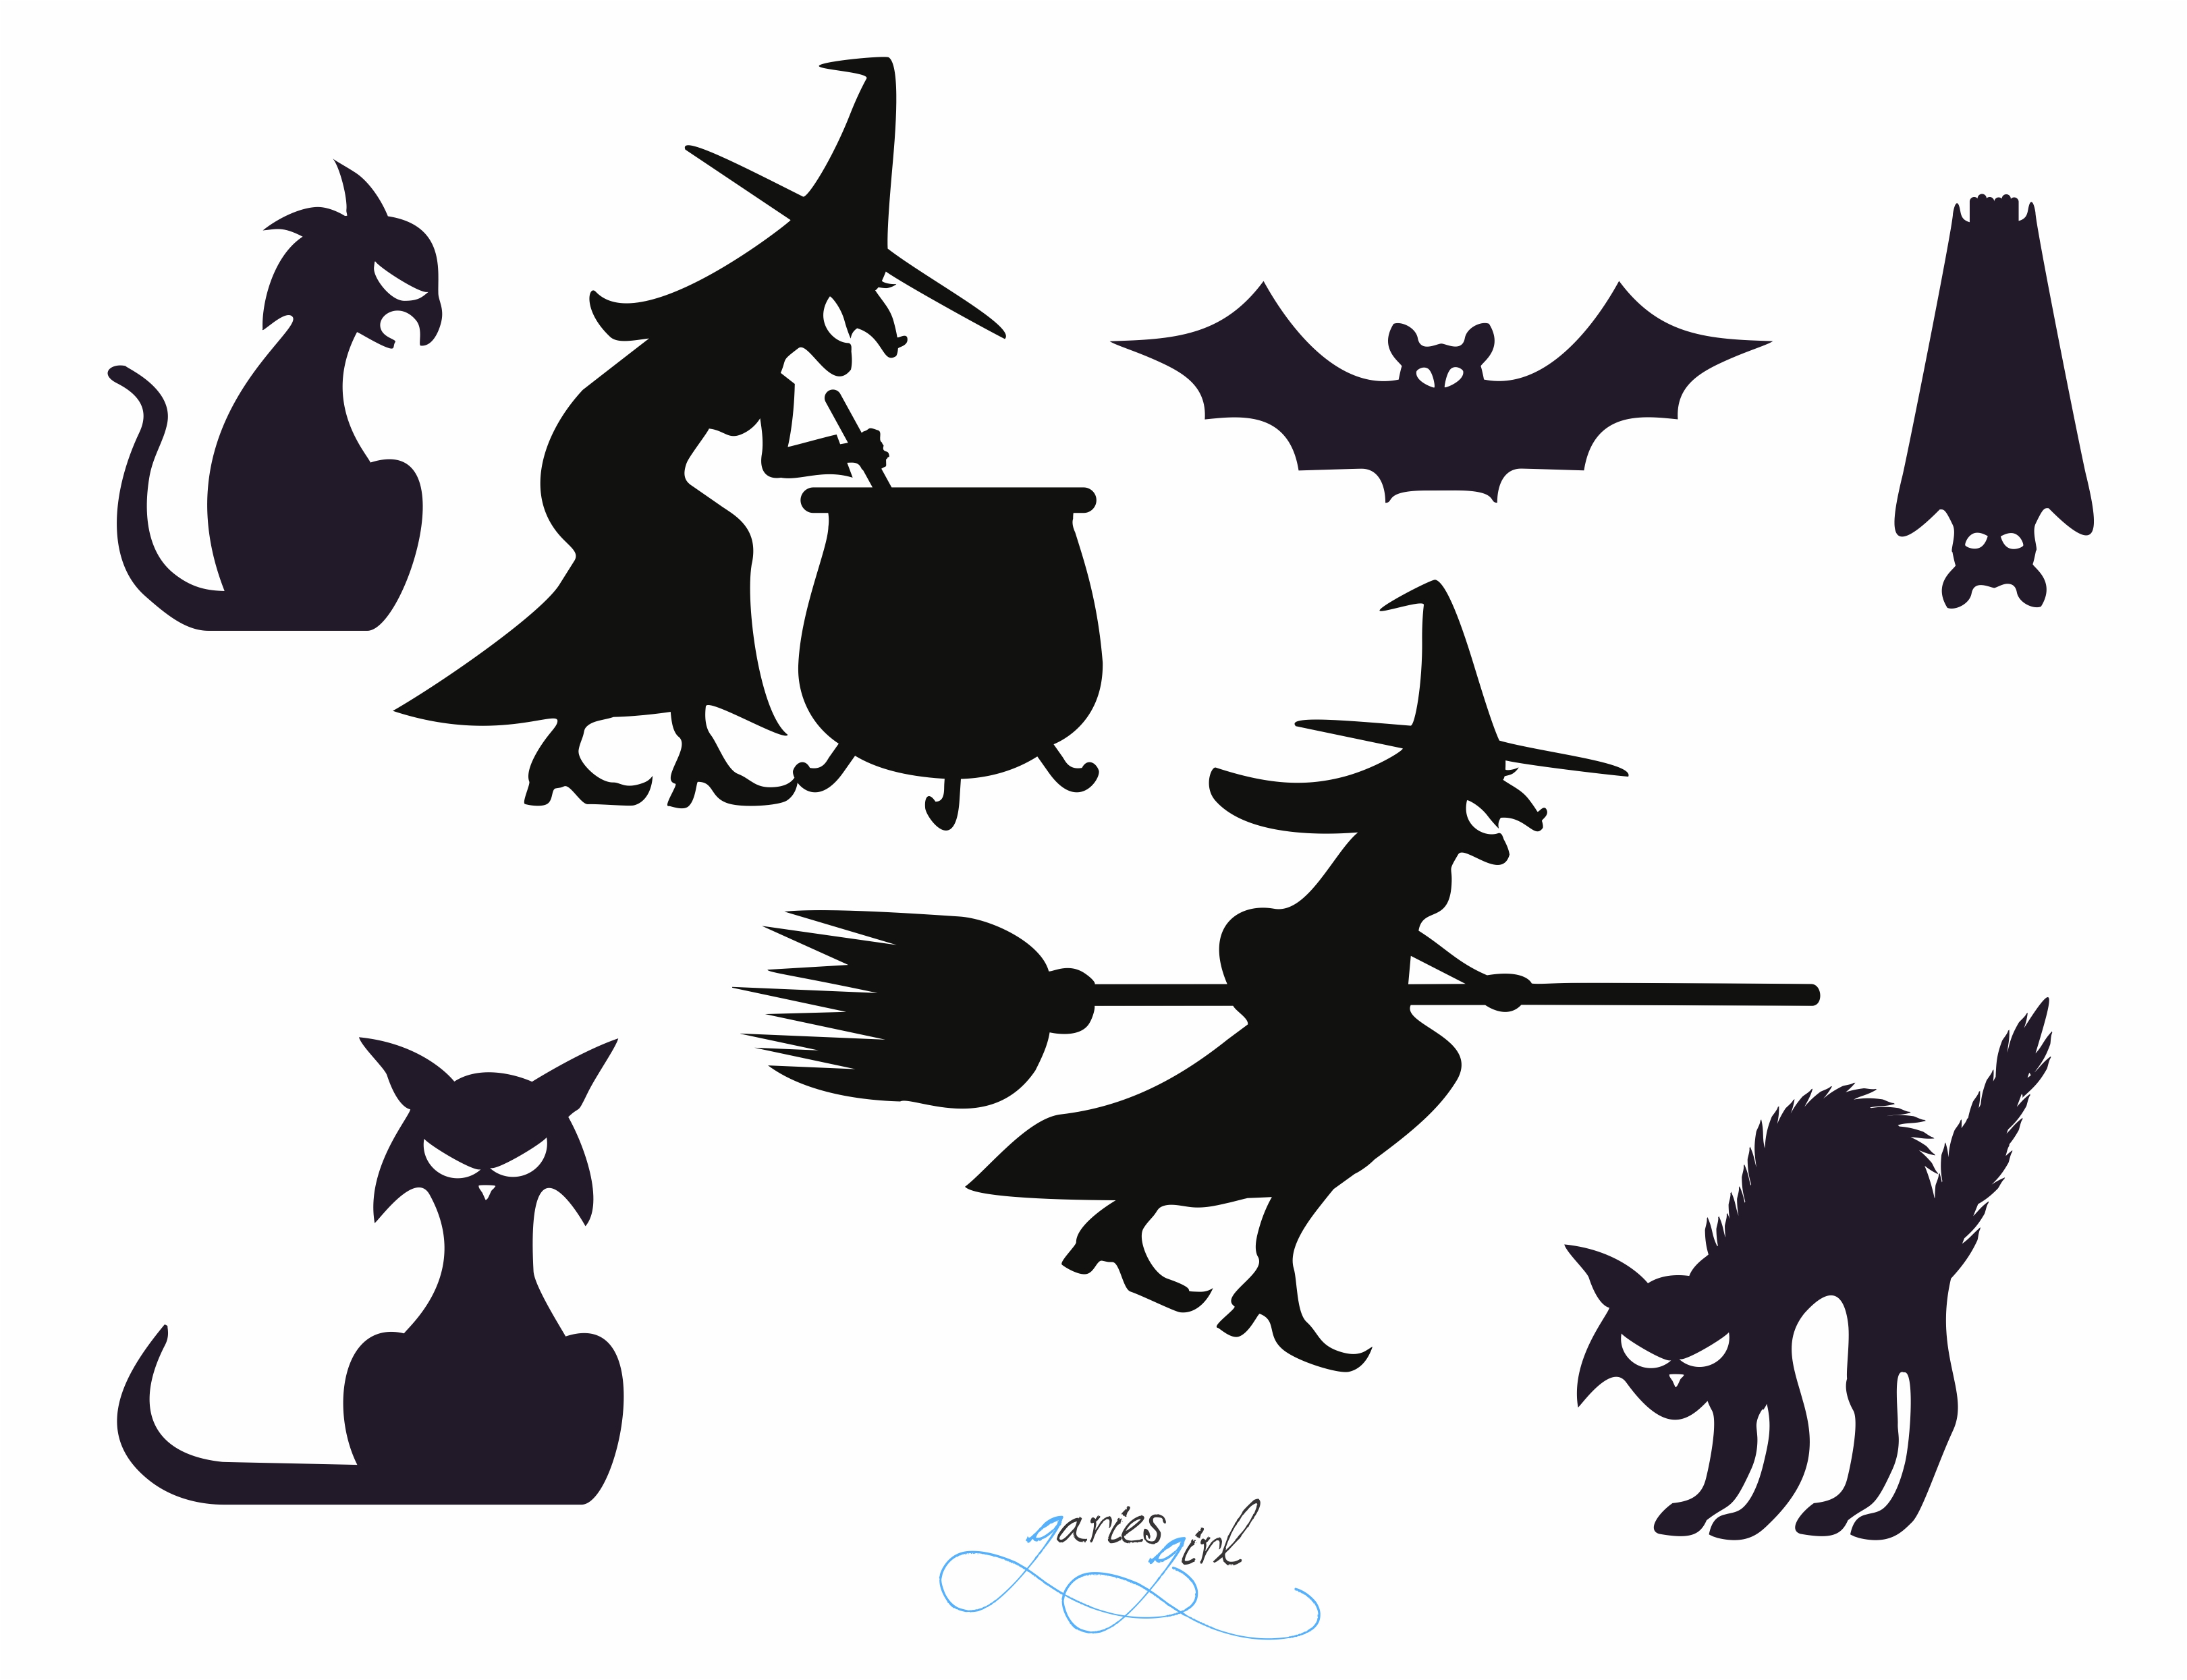
Since “Hanging Man” retired from the large window display this year, I had to create something new. I didn’t want to add more bats and cats here, so I decided to do… a witch! I have two different versions and picked the stirring witch for my larger window.
Project Cost
Your total cost will depend on how many sheets of poster board you buy, and what you pay for each. I bought mine at the Dollar Store and paid $1 for 2 poster boards. I bought 8 and only used 6 of them. Total project cost = $3!
Free Designs
Here are the designs I created this year for Halloween.
- 2 Bats
- 3 Cats
- 2 Witches
You can print them as is, enlarge and print over two pages, or have them printed on size at a store. I recommend the larger sizes – it makes for a more believable silhouette. Oh, and don’t worry, the PDF file contains just the image outlines – I do not waste printer ink over here.
What do you think of these quick, easy, and, most importantly, cheap window decorations?

Did you miss my list of Must Have items to order online? No worries – you can read all about it in this post – Halloween Must Haves. I had so much fun putting this list together and can’t wait for my order to arrive!

I’d like this if you still have the file for Halloween! Thank you!!
mistypena31@yahoo.com
LikeLike