* This post contains affiliate links. For more information, please read my affiliate disclosure. *
We started our garage project by removing some old shelving, and then we created a new shelving unit using 2 existing units and buying one more. We also painted the back wall of the garage so that the new unit could fit against it. If you missed Part 1, click here for the full post.

A Workbench is Born
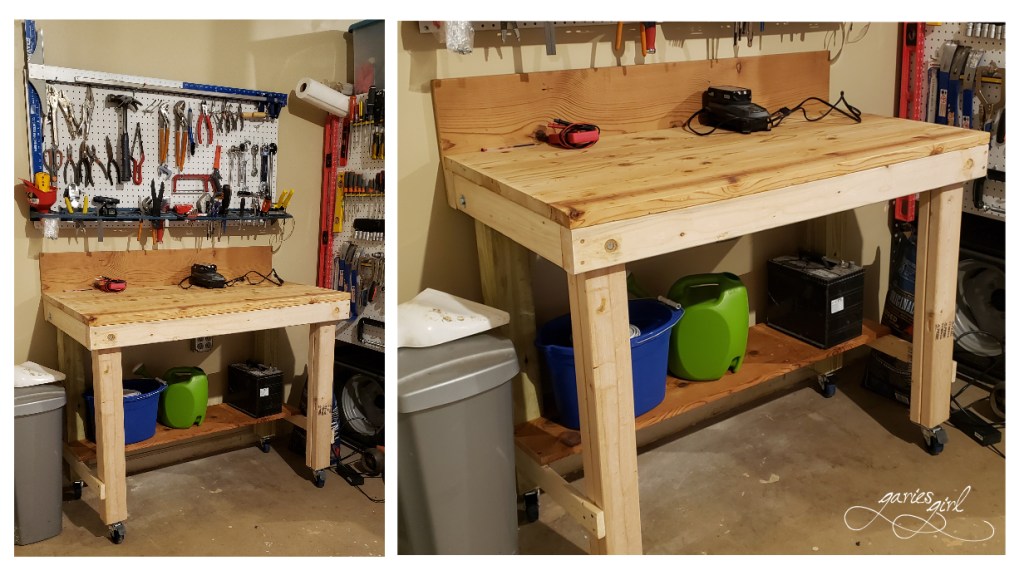
Earlier I mentioned the pretty wood that was used for the built-in shelf. The shelves were actually the perfect size for a workbench top and a new project got underway. My dad and I played around with building plans and settled on a very basic version that would use as much of our leftover wood as possible. We had enough 4×4’s for two legs, and enough 2×4’s leftover for the the other two legs and the support structure. We even had enough wood for a bottom shelf and enough screws and bolts to fit it all together!
My dad started with the top and fixed 2×4 supports to it using wood glue and screws. Then, while it was upside down, came the legs fitted into the inside corners made by the 2×4’s. We used 2×1’s to brace the legs on the sides and back. This will also serve as supports for our shelf at the bottom of the workbench. We cut the shelf to size and he then notched out the corners where it would fit against the back legs. The piece of wood leftover from our shelf was the perfect size and height to use as another support at the back of the workbench. This is going to stop smaller items from getting lost between the workbench and the wall.
It was time to sand everything down. We carried it outside and used our palm sander to sand the top and round the edges. It really brought out the grain of the wood and it looked really great after it was cleaned up. Total cost to get to this point: $0!
Pieter brought home 4x locking casters that we attached to the bottom of the legs of the workbench, making it so much easier to move around. The new workbench fit perfectly in the space between the inside door and the new shelving unit and it was right by the new electrical outlet. Total cost for the workbench: $20 for casters!
Lighting
Of course a new workbench needed task lighting. We purchased a new LED light that we suspended from the ceiling right over the bench and plugged into our new electrical outlet. Perfect task lighting right where you needed it. And it made a big difference – I never realized how dark this area of the garage could get.
This light is an awesome option for any garage.
Completing the Paint Process
My parents flew back to South Africa and by the weekend, I was ready to complete the paint job on the rest of the garage walls and the new workbench. After removing the rest of the items from the other three walls, I cleaned them and then filled all unnecessary holes and scuff marks with drywall mud. The mud needed time to dry, so I started painting my borders. It was a tedious process, up and down the ladder, working around the door tracks, not a quick and easy process. I completed the wall with the windows first, and promptly ran out of paint. Off to the store to have them mix another gallon.

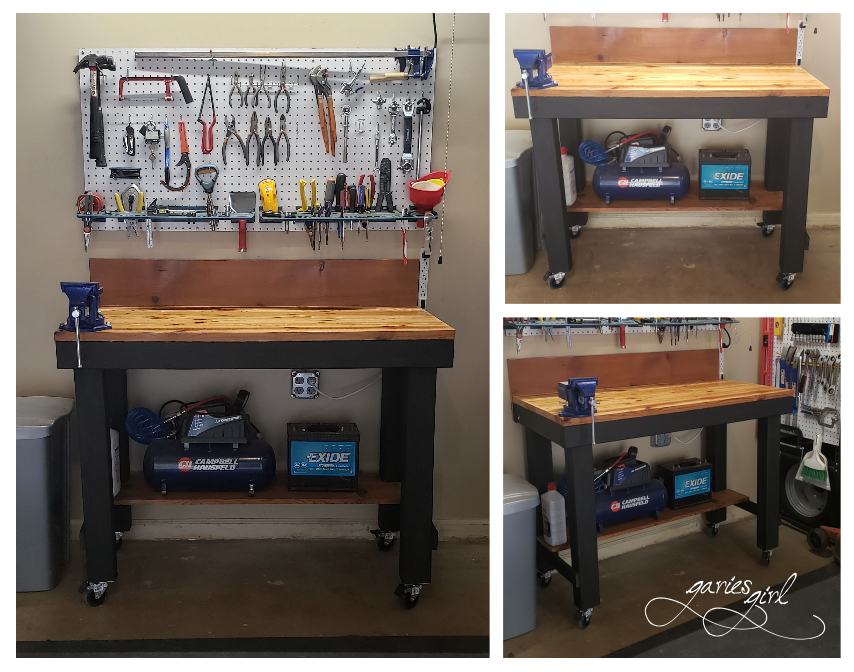
The legs of the workbench got a couple of coats of black paint. Again I was able to use some paint I had left over from another project – the DIY deck skirting we did in December. While I resumed wall painting, Pieter pulled his workbench out into the sun and added a coat of Shelack to the top for extra protection. We added two more horizontal slats, one on each side of the workbench. This will be a nice place to hang additional tools and items from.
Creating Wall Storage
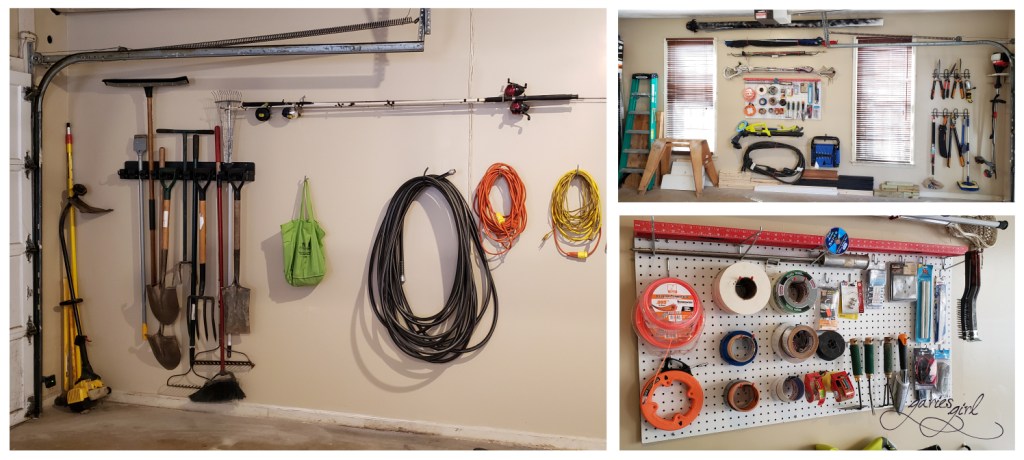
While we do have a two car garage and have some space in front of the cars, there isn’t really a lot of space on the two side walls. Additional shelving was out of the question, so I reused a lot of the wall hooks we already had and just repositioned them to store longer items horizontally.
My Halloween Candy Chute found a new home above the windows (since that will be used once a year going forward). Between the windows and above the pegboard, additional hooks hold fishing rods, a kite, flag poles and lacrosse gear. Below our third pegboard was enough room for hooks to hold our more frequently used items such as the battery powered blower and lawn edger. Below, closest to the floor, was enough room for the heavy electrical connection for our RV. And lastly, on the floor (for now) was my leftover wood. I already have plans for these.

Close to the large doors, almost into the corner, I installed a heavy duty tool organizer bar. While this item is great, it just didn’t work with the items that needed to go here. So I removed it, filled the holes, and repeated the mud, sand and paint process. I replaced it with two steel hook and rail systems (one above the other) to hold paint and garden tools. I got these from Home Depot while I waited for the paint to be mixed the previous day. They are perfect for hanging garden shears.

We have two edge trimmers (don’t ask me why) so finding a good spot for them was also important. Pieter used 2×4’s and a leftover piece of wood to make a corner shelf for one of them. I painted it the same color as the wall (of course) and now it is tucked away and more importantly, not on the floor anymore.

On the opposite wall I used more screw in hooks for electrical cords and our large garden hose, as well as two additional hooks higher up for more fishing rods. The wall space towards the front of the garage looked so good empty, that I didn’t put any hooks back up in this area. Right by the outside doors, I added the new heavy duty tool organizer bar (from the opposite wall) for shovels, pitch forks, etc. This was exactly the same as what we had before, since we liked how that worked.

Organizing Hardware
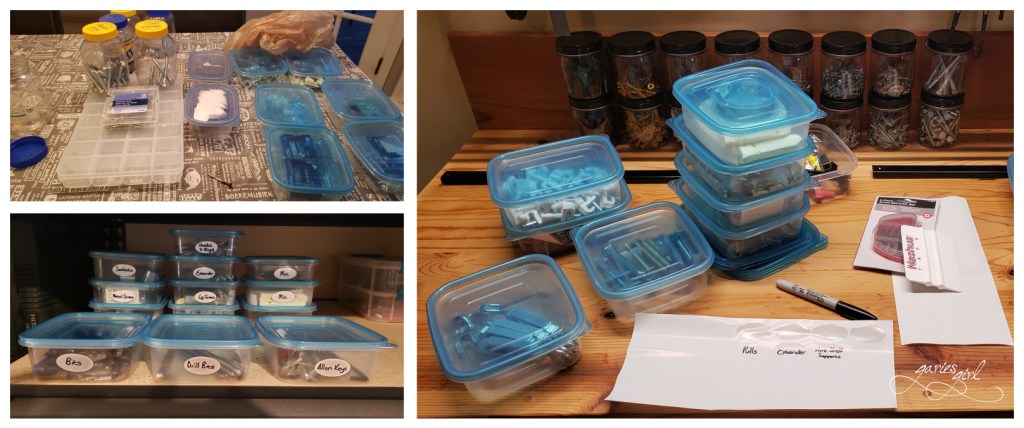
One whole shelf was used for all our screws, nails, and other small fasteners. I had these organized in repurposed sandwich meat, mayonnaise and garlic containers. It was time to up my game. We picked up three additional magnetic strips from Harbor Freight and ordered these containers online. 8 oz Plastic (which I prefer for a garage) with a metal lid, which means it will stick right to our magnetic strips without any additional metal pieces.

I quickly filled all 16x containers with screws and such. I haven’t found a good spot for the magnetic strips to go, so for now, the containers are on top of our workbench.
There was still a lot of little things left over, so they went back into the sandwich meat containers. I labeled all of these (using the labels that came with my 8 oz containers) to make it easy to quickly find what you are looking for. I also placed them towards the front of our shelves. Yes, it leaves some empty space behind them, but it is easier to see them and see what is in them this way.
Two larger bins, also bought at Big Lots last year, ended up being the perfect spot for all our electrical items and other odds and ends. I used all my labels down in the basement storage area, so picked up some more at The Dollar Store. I just love using these. They can be pulled up and repositioned and even be removed completely.
Final Touches on the Shelving
Since I didn’t properly organize the shelves when we completed that part of the garage project, it was time to wrap that up.
I reorganized all the large bins on the top shelf. We can easily reach what we use the most. I had some bins left over from my basement cleanup and these made it onto the shelf as well to group some additional items together.

Last but not Least
Our third pegboard now stores less frequently used items such as edger string, painters tape, small garden tools and other items. Everything is nice and visible and all family members can easily find it all (I hope).
I had some stadium chairs that were still looking for a home, so I added some hooks below the pegboard. See my extra wood there?
I am extremely pleased with how the garage look right now, even though we are not quite done yet. I know it wouldn’t have happened without the help from my parents, Pieter and Simon.
What is next, you ask? Well, the floor needs to be painted, and maybe the baseboards too. Don’t worry, I will find something else to do in here…
What do you think?

One thought