A new year is all about fresh starts, organization and cleanup. At least it is in this house. Once Christmas is over, and decorations are taken down, all those items need to be stored somewhere and for most people it is in the garage. This usually prompts most of us to look around the garage and go “surely this can be organized better / look better / work better”!

Our garage had one built-in shelf (it was there when we moved in) and we used a store bought shelving unit next to it. This obvious inconsistency has been bothering me since day one. Last year, I tried to make it look better by doing a shelf cleanup and reorganizing the remaining items with some new plastic bins and baskets. All the time wishing I could remove the built-in shelf completely and get a more uniform solution up in its place. Well, the time to do it finally arrived this January.

My parents were still here visiting from South Africa and since my dad is also one of those people that wants to be busy with something, it sounded like a fun project to do together. As all good projects start, we sat down to get some ideas on paper before checking to see what was available in stores.
Planning and Being Flexible with Those Plans
My original plan was to use 2×4’s and build my own shelving system. This was going to utilize 100% of the available vertical space and give me the uniformity I was looking for. It would also allow me to leave open spaces on floor level for things like the lawnmower and power washer, without building something that wasn’t sturdy. I drew up a plan and we all set off for Lowes to purchase materials.
Now, definitely be flexible and keep an open mind when you are in the home improvement store.
Since I also needed shelf brackets for another project, we were in the shelving aisle and saw a similar type of unit to what we already had in the garage. It was from the same manufacturer and advertised the same measurements as ours, but with metal shelves. I mentioned to my dad that I also have another unit in the basement and a new idea started to take shape. Instead of building everything new with 2×4’s, we could use the shelving we had and stack a new shelving unit on top of the two existing ones. Since we would still have to leave open spaces at floor level, the shelf supports that were going to be used there could be used between the two units and provide additional shelving in that area and give us a way to connect it all together for stability. So instead of lumber, we bought the shelving unit and headed home.

Getting Started
Before we could take anything apart or build anything new, we had to clear the old shelves. Both cars were moved out, and all items were placed as far away from the area we were going to work in. Of course that included some of the tools we would need later, but we didn’t have to dig too deep for those, luckily.
Simon helped Pieter and my dad take down the built-in wooden shelves. We quickly realized that whoever built this, used some really great quality wood for the shelves and sides. We tried to be as careful as possible in taking these down. And yes, some got used almost immediately in not one, but two other projects! More on that in a little bit.
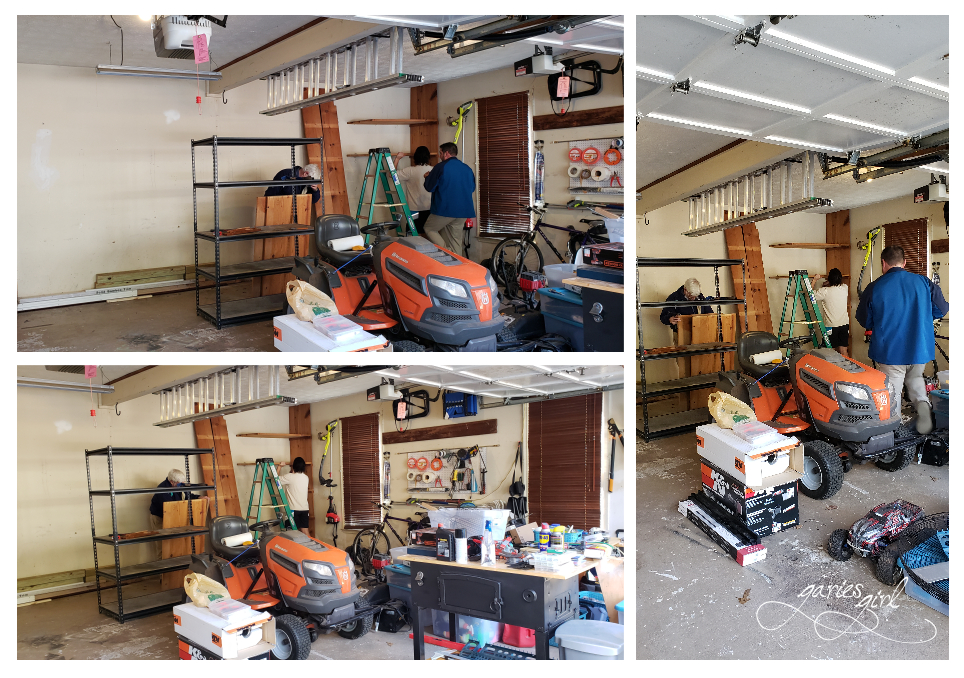
After the built-in unit came down, it was a matter of cleaning, opening up the new unit’s box and putting it together. Now, it was at this point that we realized we would not be able to use the new unit on top of the two existing units. Even though the Manufacturer was the same and the shelf measurements was exactly the same on the box, it was short an inch in depth and width. It was just not going to work out. The unit needed to be returned.
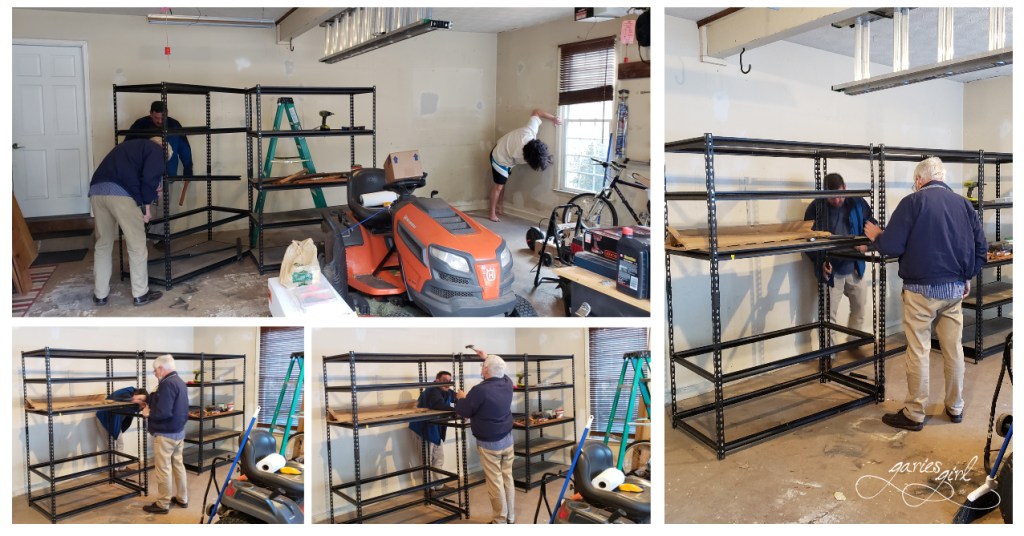
I remembered seeing another unit on my last trip to Home Depot and was sure that this one was an exact match. Pieter set out to pick it up. Even though this one was the exact match we needed, we still had to adjust our plans at this point. Placing two units apart from each other and connecting them with additional supports in the middle was not going to work. The legs are constructed in such a way that you can only connect whole units to each other. We decided not to go higher on the shelves, but instead use all three units next to each other.
Building and Connecting Shelves
Once all three shelving units were in place, we started to fasten them together with washers, nuts and bolts. Since they were being built away from the wall, it seemed like a good idea to go ahead and paint the walls while I still had easy access. I focused on the back wall and part of the sidewall where the shelving would go and quickly got a coat of leftover paint (I’ve been saving it for this exact purpose) on the walls. Since I was doing a darker beige on a lighter beige background, I was able to get away with one coat and a couple of touch-ups.
Once the paint was dry, we moved the new shelving unit into place and also fixed it to the back wall, directly into some studs. With everything stable and secure, we removed some of the bottom shelf supports and added them to the unit on the right-hand side for additional shelving (the units came with only enough hardware for 5x shelves each, including the top and bottom).
Adding an Electrical Outlet
Now, this is another one of those bothersome examples. Our garage only has one electrical outlet (what?) and it is located on the inside wall, right by the door to the inside of the house. Everything we plugged into this outlet were things we would fall over all the time since it was right in the natural path between the inside and outside doors.
My brother-in-law David was quick to show up with supplies to create a new outlet on the back wall of the garage. We have an outlet on the other side of the wall in our foyer and David and Pieter quickly got the new garage outlet installed.

Organizing the Shelves and Pegboards
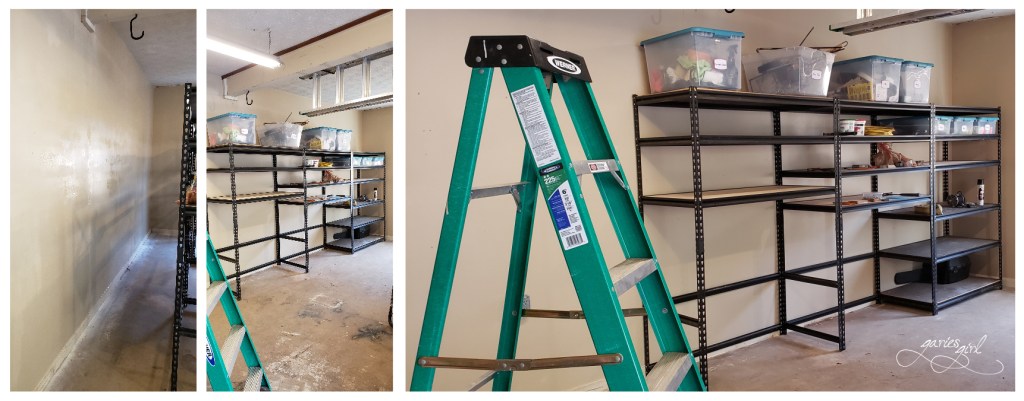
My dad secured one of the pegboards to the wall to the left of the shelving unit and the other to the side of it. This got us to the point where we were ready to put things back on the shelves and back on the pegboard. The lawnmower got pushed in, the power washer and some other lawn equipment rolled into their spots, and all the other items made it back onto the shelves.
I love plastic bins and have been using them in the garage since last year January. They are perfect for grouping items together and fit well on the top shelf. I have one for paint supplies, car wash supplies, welding and miscellaneous items. I also have smaller ones that went onto the second shelf. These are for garden supplies, plumbing supplies, hobbies and so on. Also from Big Lots, some open plastic baskets. They are the same height as the smaller bins and are perfect for storing more odds and ends, ie Pieter’s growing collection of bits (!) and other random items that we use frequently.
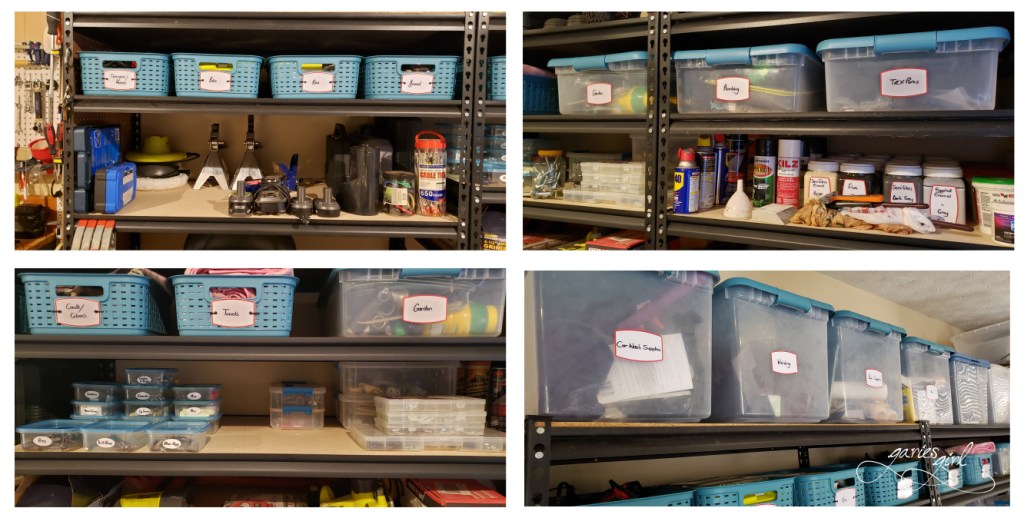
My dad took charge of the tools and he and mom organized all of it across the two pegboards. He even attached the magnetic strips that used to be on the wall, onto one of the pegboards and used these for the larger tool collections. This part of the garage was starting to look like a very well organized space indeed!

The end of my parents’ visit was approaching and it was time to wrap up the cleanup part of our garage project. Two cars were able to fit in the garage again and we were at a good stopping point. I would be able to finish up the rest of the cleaning and painting by myself and send updates back to my parents in South Africa.
Don’t miss Part 2 of our Garage Cleanup and Organization Project!


6 thoughts