* This post contains affiliate links. For more information, please read my affiliate disclosure. *
Warmer temperatures finally arrived in the south, and it is time to prepare our deck for summer hangouts and braais (I just can’t say barbeques, it just doesn’t sound right). Last year we completed a lot of additional deck projects like new shade sails and lighting. This year, we can focus on smaller tasks and get to outside living faster.
Here’s how you can get your outdoor deck ready for Summer:

Clean and Stain the Deck and Railing
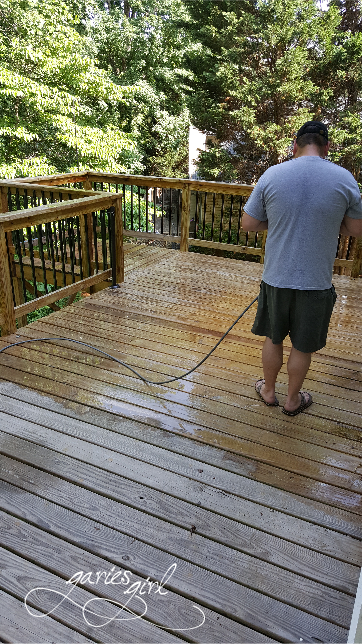
Don’t underestimate the power of a good clean. My favorite tool here is a simple broom. I can get into the grooves and dislodge pine needles and leaves and get most of the dirt and debris loose. I sweep the deck and the railing and even remove cobwebs from higher areas with a broom. We used our palm sander to give the top of our railing a light sand and this creates some wood dust that also needs to be cleaned up. After sweeping, I just use our leaf blower to remove all the loose debris and dust. Once that is done, you can bring in the big guns aka pressure washers.
It wasn’t necessary to sand down our deck again this year, but we did give it a light pressure wash. Another easy step that will clear off all the loose dirt and debris. Our black railings had some green mossy growth on them (must have been there for years already), and I went around with a bucket of soapy water and a rag and washed them all by hand. Pieter gave them a quick rinse with the pressure washer and also sprayed down the windows and siding of the house while he was out there.
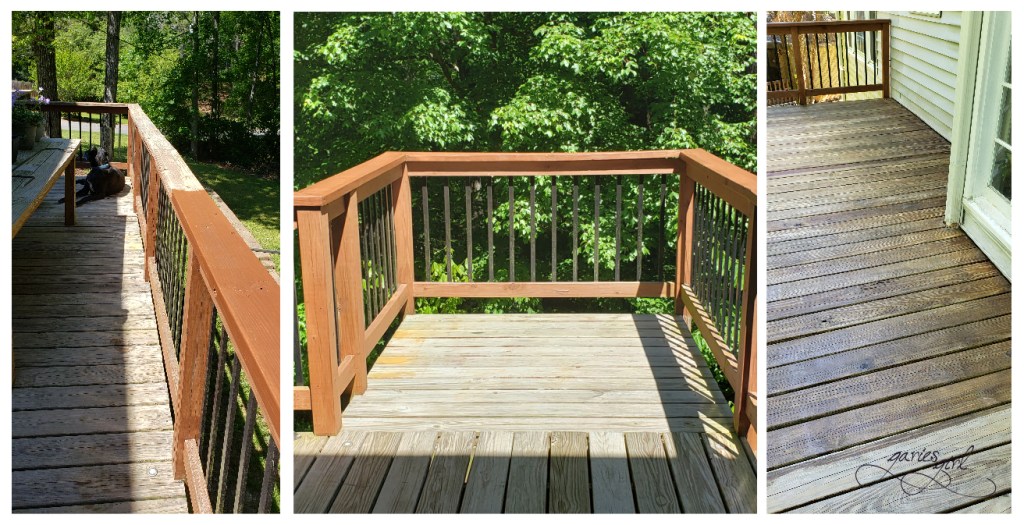
We’ve been staining the railing a reddish-brown color for a couple of years now and used some more of it on the top of the railing again this year. It is possible that you will also have to seal your deck. It sounds like a difficult task, but it’s really another one of those easy DIY projects. Make sure your surface is completely dry and that you don’t expect any rain for the next couple of days – a difficult prediction in Georgia this time of year… Move all your furniture out of the way and use a paint roller to apply a thick coat of sealant. It is a very good idea to start in the furthest corner and work your way back to the exit. Don’t want to get stuck in a corner, lol!
The last time we sealed our deck, we completed the project over two days. All furniture and plants were moved to one side of the deck so we could seal the cleared side first. Once it was dry, we moved everything to that section and sealed the remainder of the deck.
Clean and Stain/Seal Outdoor Furniture
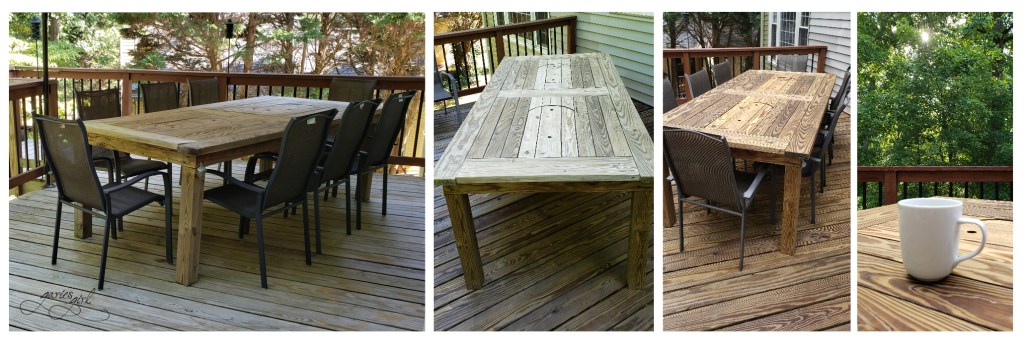
If you have wooden outdoor furniture that needs a coat of sealer, now is the time to get that done too. We have a large wooden table that Pieter and David, our travel-loving brother-in-law from Over50andThrifty, built while we lived in Rome. Here is a link to the original project – Building a Bigger Table. It now gets a yearly clean and seal to bring out the woodgrain and help it last longer. It always looks so much better after receiving some love and gets us excited to spend time outside.
Everything else can be rinsed with the pressure washer. I’ve been adding light coats of black spray paint to a lot of our outdoor furniture as well. Paint fade over time and the new coat give it an instant update.
Create Shade
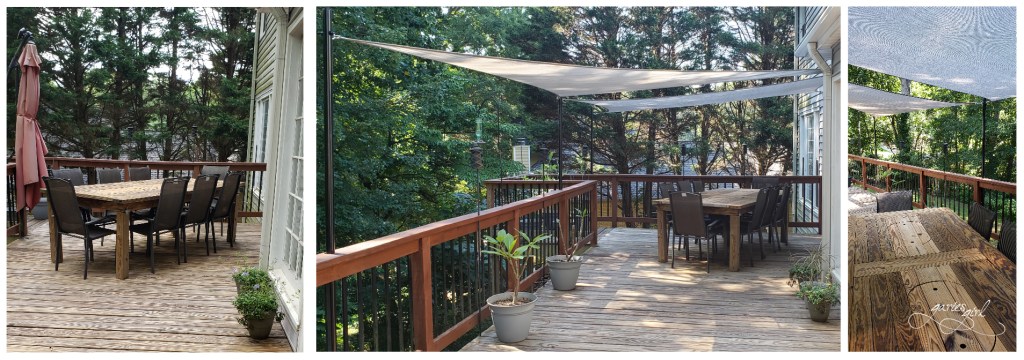
If you don’t have a covered deck and are looking for a quick DIY project to add some, consider shade sails. We added three of these to our deck last year as one of our COVID quarantine projects and just love the effect it gives. Read all about the process here.
A major plus for shade sails is that they can be removed quite easily. We’ve taken them partially down twice now – once when we had a bit of sleet and snow, and just the other week when a strong storm promised some high winds and hail. This last storm ended up being not as bad, but it felt good to be prepared. Better to be safe than sorry!
Fix and Add Outdoor Lighting
Take a good look at the lighting situation on your deck. Of course, this is easier after dark so go ahead and turn your lights on and take a look. For us, it was a simple swap to remove the old light fixtures and install new ones from Home Depot. Also, don’t get rid of the old fixtures before seeing if they could be used somewhere else around the house. One of our old fixtures worked perfectly by the basement door – an appropriate location for a motion sensor light.

Another solution for additional light on your deck is some LED string lights. We got ours from Harbor Freight and attached them to the same poles we used for our shade sails. We found the coolest outlet light sockets that made it possible to simply plug the string lights into our light fixtures. Who knew those existed? Remove your lightbulb, add the socket, plug in your lights and you are all set. We removed one of the glass panels from the side of our light fixture to accommodate the string light plug. Now one light switch inside the house turns on all the lighting outside.
Quick Tip: switch out your lightbulbs in the main light fixtures to match the ones on your string lights. The strings included some spare bulbs and now we have consistent bulbs and lighting!

Plan for Pesky Bugs
Spring normally doesn’t last very long here in Georgia and while we don’t see any mosquitos quite yet, they will be out soon. We spray our backyard for mosquitos, but it never gets them all. We added black metal tiki torches to our deck railing after moving in and I would fill them with citronella fluid beginning of the season. By the time we have our first evening braai they can be lit to help keep the pesky bugs away!
These black metal tiki torches are available online and are an excellent option for your back deck. We made holes through the top plate of our railing and inserted ours, but you could fasten them any way you think would work best.
I would also recommend adding some plants that naturally repel mosquitos and other bugs. Just buy a few while you are out getting your other greens and colors.

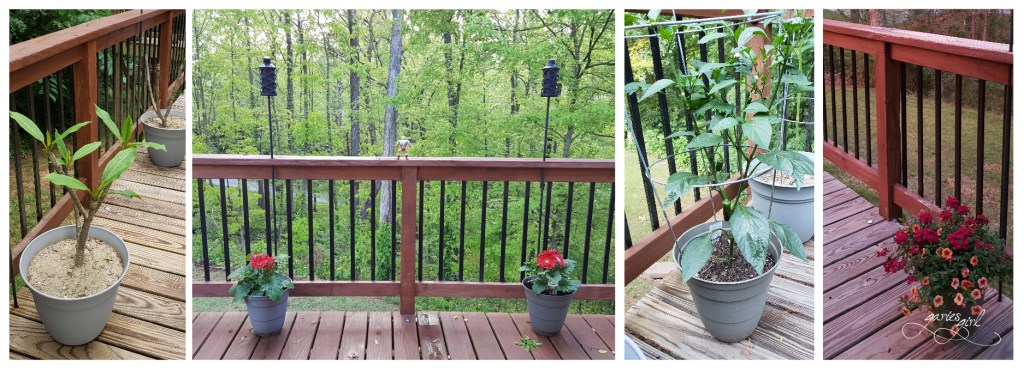
Add Plants and Color
You might already have a lot of pots on your deck just waiting for new plants. Go ahead and stop by your local nursery (or wherever you get your plants) and pick up a few to plant out on the deck. I also add in some new potting soil to give my plants the best chance at a good summer.
We tried growing tomatoes on the deck last year, but it was just not a success. The Jalapeños on the other hand grew fantastically here and I loved walking just a few steps for my fresh salsa staple. I have prepped my pots already and the baby plants are waiting inside for the last of the cold weather to finally leave us.
Like I mentioned before – don’t forget your bug-repelling plants! I love adding lavender, rosemary, lemongrass and citronella grass to outdoor pots.
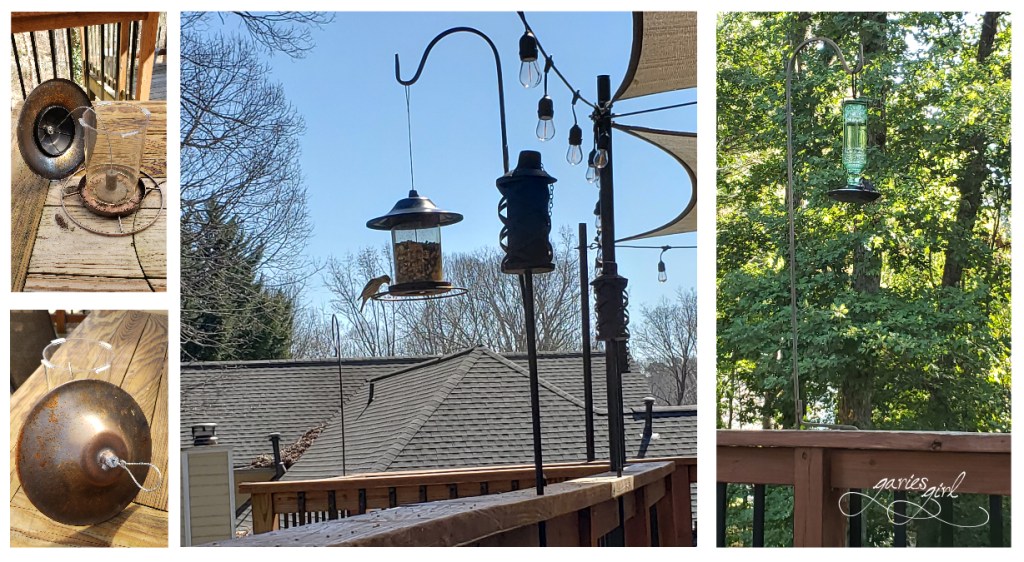
Feed the Birds
I added three different bird feeders to my deck. One is a hummingbird feeder and it is already set up for the little cuties to come drink from. My other two feeders are for the local birds. Finer seed in the one and a fruit and nut mix for the other feeder. This feeder also got a quick spray paint touch up. I bring my feeders in at night – we have a mysterious nocturnal visitor that can empty a full feeder out overnight. Can you spot the little hummingbird from last season? Took a picture while it was sitting down on my feeder.
Clean and Prepare your Grilling Area
We have a new charcoal grill that we bought in December and it will not need a lot of cleaning. It will still get a wipe down to make it look its best. Our old grill is now our new outdoor grill table and my temporary shower curtain cover has been keeping it mostly dry out on the deck. That was a DIY fail and I’m not quite ready to share the horrible outcome with the world. Maybe later, lol. This table will also get a wipe down and we’ll be all set.

There you have it – everything that we do to prepare our deck for summer braais and evening hangouts. How do you prepare your deck for summer?

One thought