Giving an old, tired looking furniture piece a makeover must be one of the easiest and most rewarding DIY projects out there. This means we can look at what we already own and reimagine our existing furniture pieces rather than buying brand new ones.
The dresser in Pieter’s closet is a perfect example. It wasn’t pretty and didn’t fit in with any of our other furniture, but it still had a purpose. And just because it didn’t live in the main areas of our house, didn’t mean what it looked like didn’t matter. Giving it a makeover wasn’t going to change the way it functions, but it will surely change the attitude of the person seeing it every day.

The Plan
I knew that I had to get Pieter involved for this one. It was his dresser after all and we were all looking for things to do while being at home. We decided that it will have to be sanded down properly, get a couple of coats of paint and new drawer hardware. We went shopping for paint and hardware at our nearby Home Depot and were excited to get it done.
Supplies
- Palm Sander
- Sanding Pads
- Paint
- Paint Brush and Roller
- Drawer Hardware
Getting Started
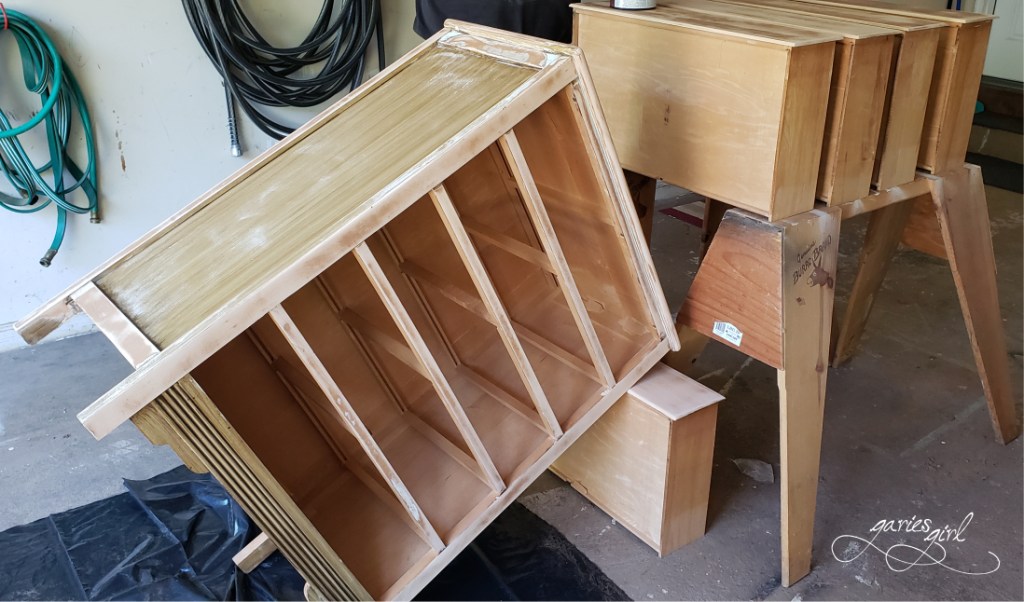
The sanding process is dirty, dusty work and best done outside or where you can clean up easily. Trying to attempt this in the area where you sleep or where you keep your clothes, is just not a good idea. So we removed all the clothes from the drawers, the drawers from the dresser and prepped a spot in the garage for the project.
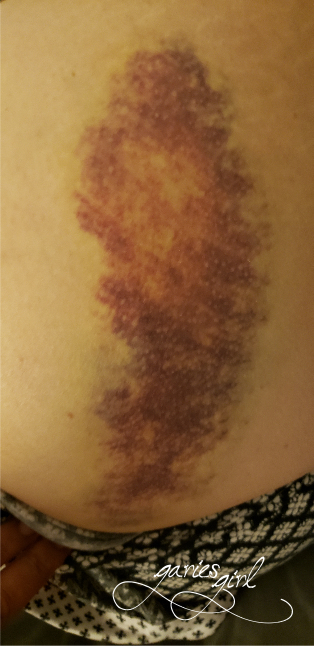
Pieter and Simon carried the dresser downstairs into the garage and I followed with the drawers. My first trip was with two drawers, but because I’m lazy I carried the remaining three drawers down in one trip. And of course I lost my balance on the stairs (on my self installed carpet runner) and I fell/sat down hard on one of the stair tread edges. Everyone came running expecting me to be seriously injured. Totally understandable, since I made quite a racket when I “sat down” on the stairs. I don’t fall quietly. I think they were having flashbacks to the time I fainted and fell in the upstairs bathroom… But that is a story for another day.
Thankfully, I didn’t use my hands to try and break my fall – would have broken a wrist for sure. But my butt (see what I did there?) was immediately complaining something awful and I knew this “misstep” was going to leave a mark. I wasn’t wrong. By that evening I started to turn purple and blue and sitting down was very painful. And I, ever the optimist that I am, kept pointing out to everyone that would listen that at least I didn’t drop or break any of the drawers!
Back to the Dresser
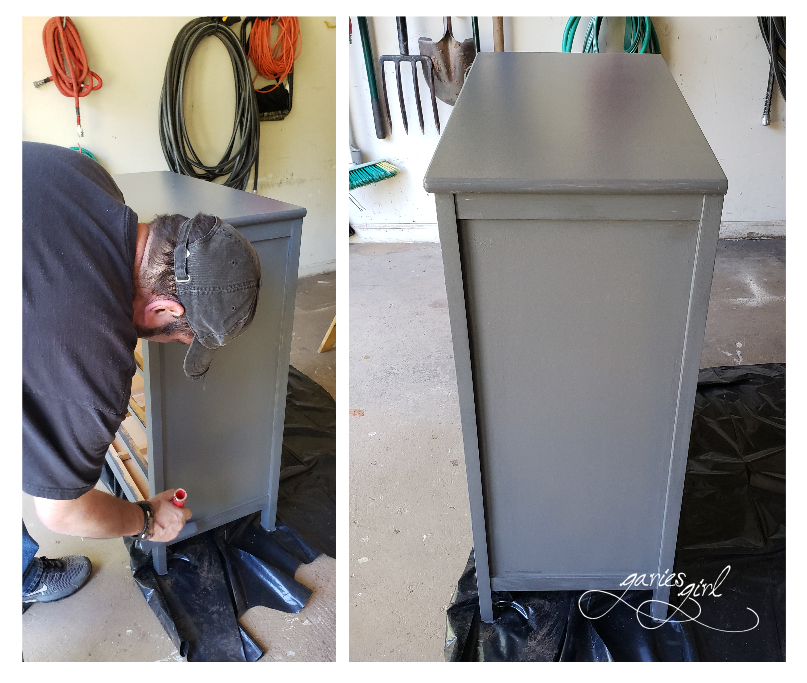
Pieter used our handy electrical palm sander to sand down the top and sides of the dresser, and all the drawer fronts. Next, I used a damp cloth to wipe everything down before starting the painting part of the project.
I prefer a paint/primer combination when painting anything and everything around the house, and this project was no exception. I used both a brush and a small roller to cover all the surfaces and then added two additional coats of paint.
Finishing Touches
We actually replaced the hardware on the dresser shortly after it moved into Pieter’s closet a couple of years ago, but with what we had around the house, so the handles didn’t quite match. I reused three and bought two more and now all the drawers finally had the exact same hardware – a must when you do this type of update.
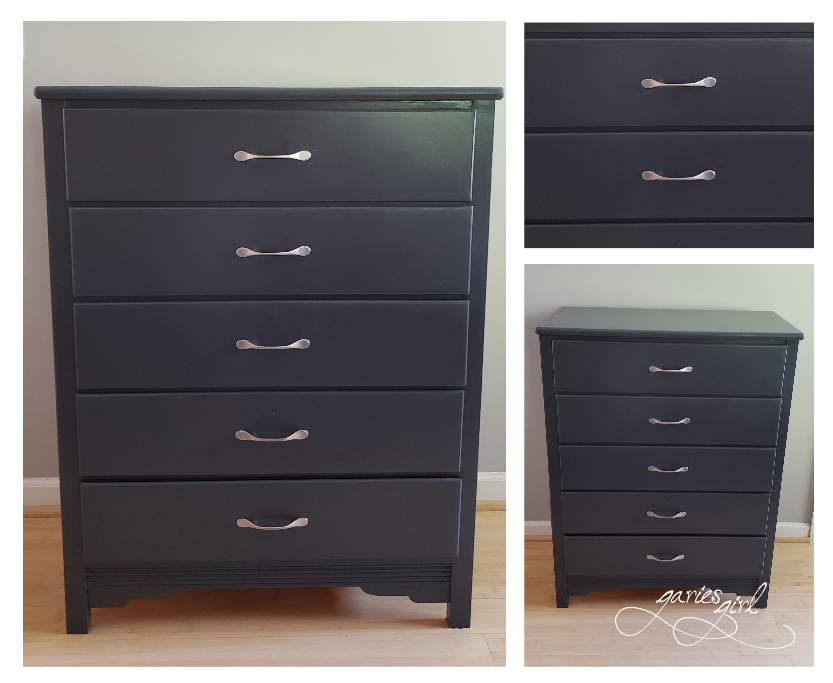
We gave the dresser a couple of days to dry properly before carrying it back up to the master bedroom. Unfortunately closets are not the best places for picture taking, so don’t mind the closet clutter and lighting!

What furniture piece did you update recently and how easy was it?

3 thoughts