* This post contains affiliate links. For more information, please read my affiliate disclosure. *
I have been playing around with the color scheme in our master bedroom and decided to change it up by getting rid of all the yellow accents. Of course, when I say “get rid of” I mean it just had to go elsewhere in the house. No reason to throw away or donate perfectly usable décor items!

The logical spot for all the yellow-themed items was the guest bedroom of course. I have to say – they actually do fit much better here. Especially since the walls are a pale yellow and I have white bedding. I removed all the green décor items and replaced it with the items from our bedroom. A large canvas, decorative pillows, a black and yellow metal wall hanging, yellow candles and flowers all moved downstairs. I also carried my yellow and grey patterned chair down to the guest room. That meant that the brown chair didn’t have a home in the basement anymore and needed to come back upstairs.
The brown chair didn’t really fit in with our master bedroom color scheme (the only spot for it was in front of the grey curtains) and the next logical home for it was right here in my office. So it made another short trip from our bedroom to my office. But it is brown though… and my office is all white, grey and turquoise (at the moment).

The Plan
Complete supply list and total project cost located at the bottom of this post.
I realized that instead of doing a complete reupholster job on this chair I could just cover the existing brown fabric with something different. I already had a staple gun and all I needed was the fabric. Hobby Lobby is my go-to store for this type of purchase. I love their variety of fabrics (I can’t have too big a selection – that is just too overwhelming) and I usually browse the other isles while I’m there. You never know what else you need or what ideas you might get while walking around the store.
I measured the chair to get an idea of how much fabric I needed before Sidney and I went shopping. We picked out a neutral grey fabric with a delicate white pattern. As usual, I used my “40% Off One Item at Regular Price” coupon – a must-do when Hobby Lobby shopping!

The Makeover
I cut my fabric in two giving myself separate pieces for the seat and the back of the chair. The seat looked like the easiest part of the project so I started with that first.
I positioned my fabric with equal overhang on both sides and gave it a small folded seam at the bottom. My chair had a cover on the bottom that was held in place with Velcro. I peeled this back and started with the stapling process. I started with a couple of staples in the middle and worked my way to the left and to the right, making sure I’m keeping the fabric smooth and stretched tightly as I go.
I folded the fabric for the corners and trimmed off the excess to keep it from becoming too bulky. I then worked my way down each side, again keeping the fabric smooth and stretched tightly as I stapled.
I tucked my fabric between the seat and chair back and did some more folding, cutting and stretching at the corners to get a smooth fit.
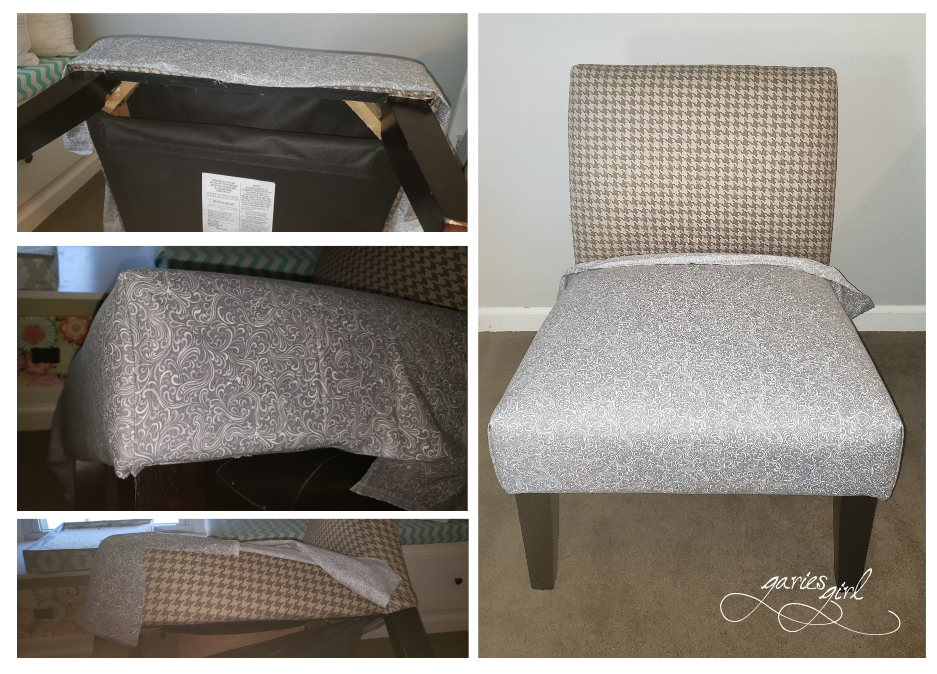
The back was a bit more tricky to get just right. It is curved and pulling the fabric tight here meant it hung down straight instead of following the curve of the chair. I didn’t have an immediate solution to this dilemma, and once I realized that if my fabric did follow the curve it was going to be a bit too short, decided to take a break from the project.
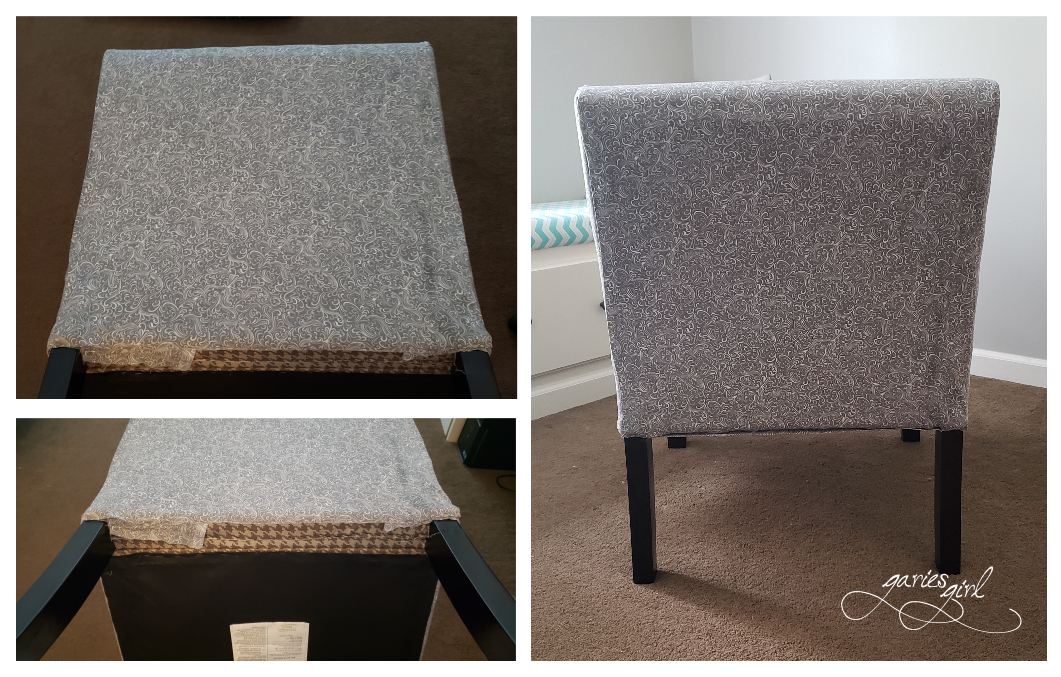
I came back to the project a couple of days later after finding the solution to my problem while working with a piece of leftover fabric. I had two wooden picture frames that I covered with a different fabric many years ago and I used pieces of the new fabric to breath new life into these. Because they were wooden frames, I used wood glue to keep the folded fabric in place and this is where I had my lightbulb moment – I can glue the fabric to the back of the chair!
Since I still had some spray adhesive leftover from my corkboard project, I just grabbed that and started spraying. I sprayed both the back of the chair as well as the inside of my fabric. It looked a little wet for a little while but lucky for me the glue dried clear and is doing a great job of keeping the fabric in place.
I cut an extra piece of fabric, folded the edges and used it to cover the bottom of the chair where all my fabric came together. This was also glued in place with the spray adhesive and now hides the staples that were too visible.

Makeover Complete
This is the end result and I am very happy with the new look. This has always been a very comfy chair and now we will have another great place to sit while in this room. I don’t have many guests over, but the kids do like to come in from time to time and stay for a quick chat. Before they would sit on the exercise ball and now they can use this beauty.

Supply List
- Fabric
- Craft Knife and Scissors
- Spray Adhesive
- Staple Gun and Staples
Total Cost: $68.24
Have you given a furniture piece a makeover using fabric lately?

2 thoughts