* This post contains affiliate links. For more information, please read my affiliate disclosure. *
Since moving into our current house, I’ve found plenty of projects to keep me busy. From painting rooms to building furniture with Pieter, to fixing, decorating, decluttering, and always organizing.
We’ve updated our daughter’s room, From Office to Bedroom. We changed the paint color throughout the house. Changing the Paint Color: Yes or No? and most recently, changed the carpet on the stairs DIY Stair Runner Refresh.
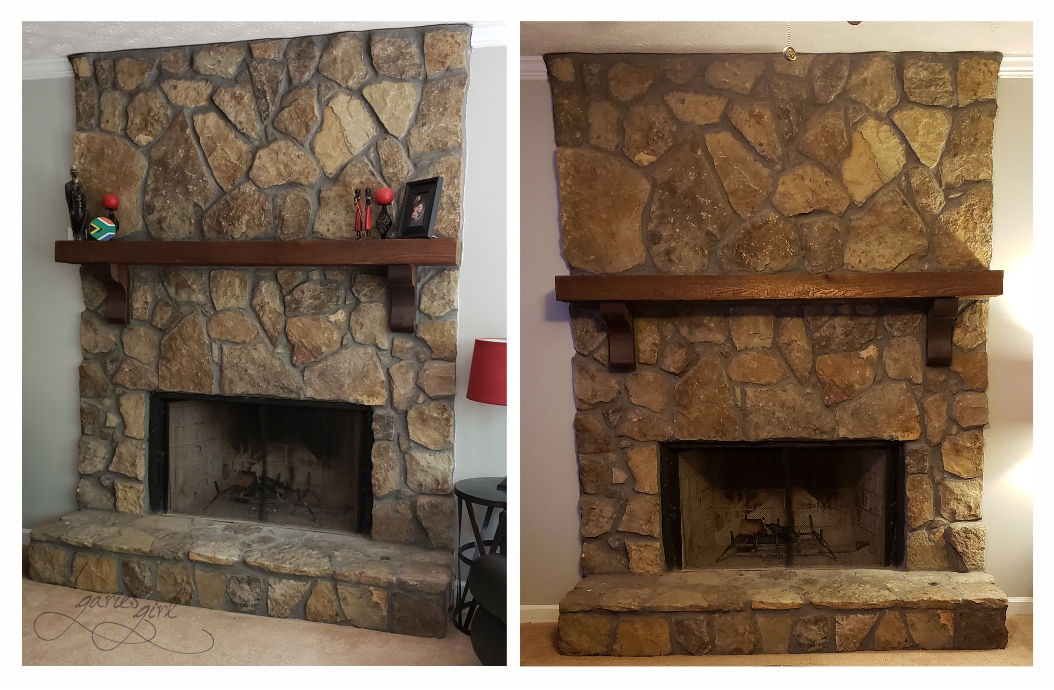
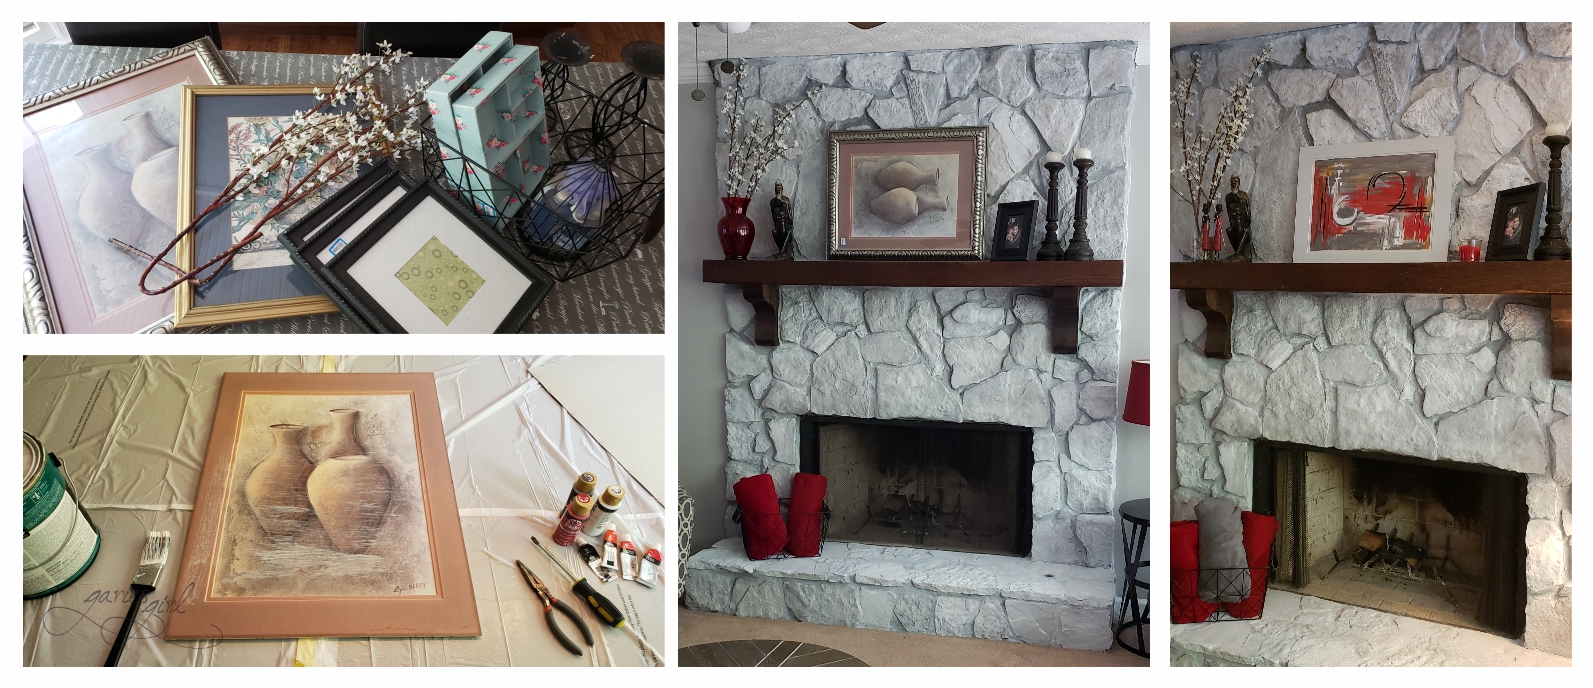
Updating the fireplace in the family room wasn’t really on my initial list of items to do, but after painting the walls grey and trim white, it became obvious that something would have to be done to update the fireplace. The stone was just too orange for my liking. I do love the rustic, dark wood mantel, but I never got around to properly styling it. We had one of Pieter’s favorite Karoo photos printed on canvas, and the plan was to use it to fill up the empty space above the mantle. As you can see below, that hasn’t happened yet 😉 The picture on the left was my final version of mantel decorations for the longest time… How sad does that look?
The Plan
I played around with options for updating the fireplace and settled on whitewashing it. I discussed my plans with Pieter, but he didn’t like the idea of painting the stone at all. I showed him some photos I saved for inspiration and asked him if it was still a no from him. Since he didn’t give me a hard no and was conveniently away on a business trip to England this week, I decided it was time to tackle the eyesore in our family room. I’m sure he would love it once he sees it (whether on this blog or in-person, surprise!). Oh, and my plan included spending as little money as possible on this. I hope that softens the blow a bit…!
Preparation
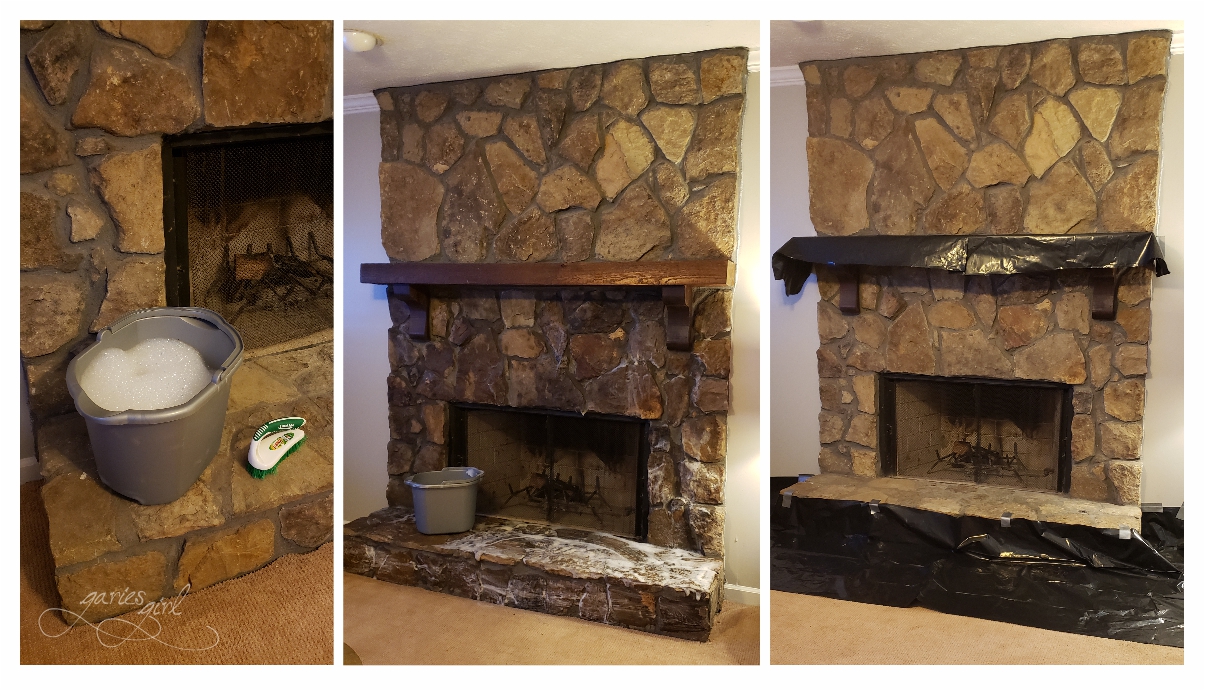
I gave the whole fireplace a good scrub down with warm water and dishwashing liquid. I had no idea how dirty it really was, since washing the fireplace never made it onto my House Cleaning Plan! After giving the stone a full day to dry again, I completed the rest of my prep work. I didn’t have any drop cloths or plastic sheets, so I improvised and cut up some heavy-duty trash bags. I taped them to the mantel and covered the carpet around the hearth. Lastly, I moved all the furniture out of the way and brought in my step ladder.
Whitewashing
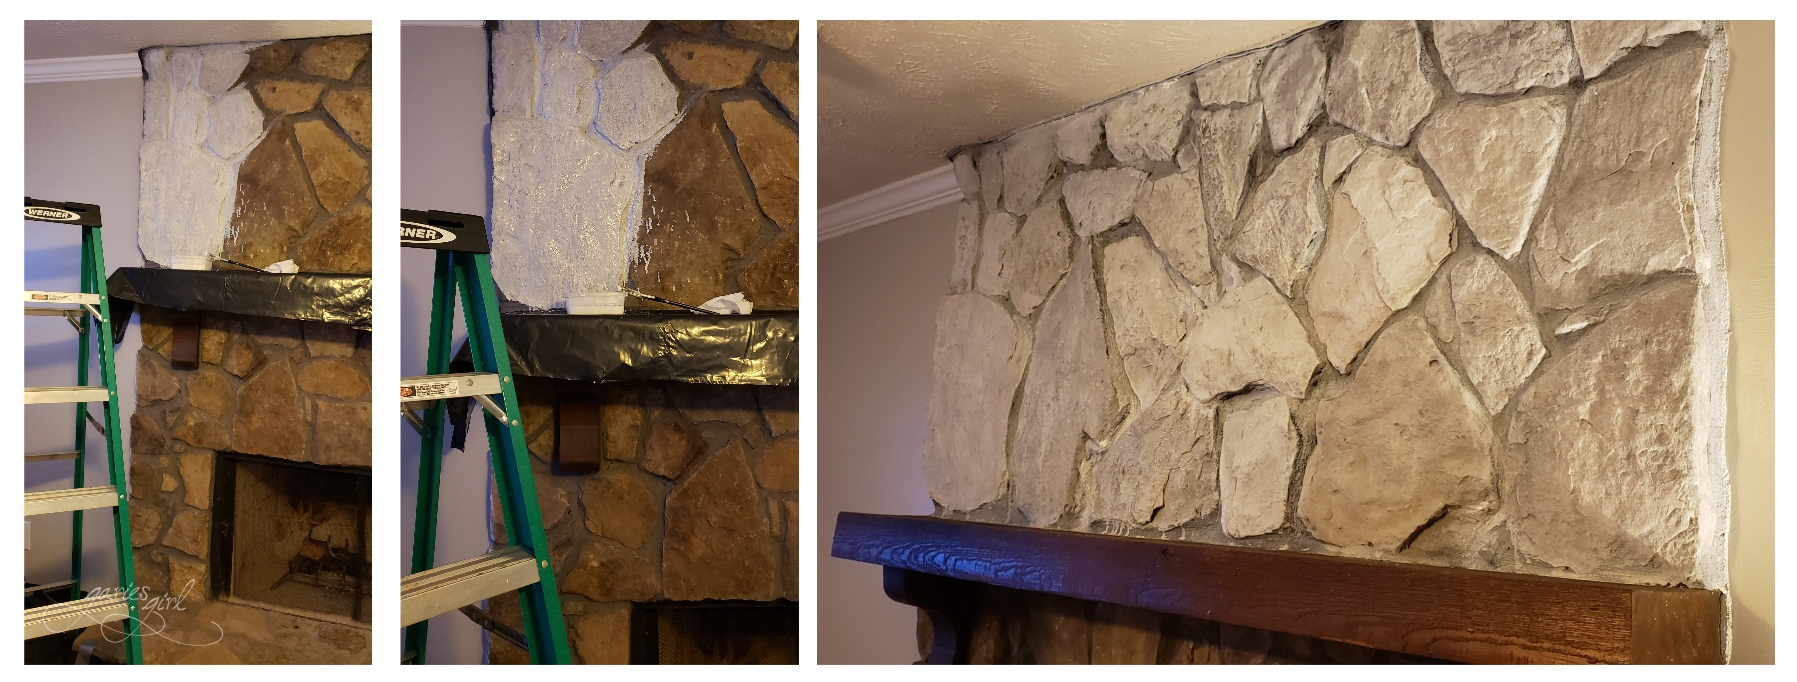
I had some leftover white paint from my previous projects, so I just mixed that with some water. I used half paint, half water, and mixed it up in a small plastic container with a lid. Shaking the container did a good job of mixing the paint and water. I did let it separate a bit by letting it sit before starting the whitewash process. You might think this is a bit crazy, but I used the more watery paint on my grout lines and just dipped my paintbrush a bit deeper to get the thicker paint for the stones themselves.
I started right at the top of the fireplace and worked my way over and down. I have to confess – that first painted section scared me! It was very white against the rest of the stone. My initial thought was “Pieter is going to hate this. I should have left it alone…”. And that is not a good thought to have when starting a project. Especially one where you can’t really undo your work. Stopping was not an option anymore, so on went the rest of the paint mixture. The watery paint penetrated the grout lines a bit more and gave me the grey contrast I wanted from the start, without adding an additional step to the painting process. I completed most of the fireplace on day one and the hearth and some final touch-ups on the second day.
I am a very steady painter (how is that for tooting your own horn?), but that is not the case for all of us. If you have to tape, go for the blue painters’ tape. I usually keep some in stock.
Finishing Touches
This might be hard to believe, but by using my “settled” paint mixture, I was able to complete most of the fireplace with just one coat. Yes, one coat did the trick! I made sure to step back from the fireplace often during the whitewash process to identify individual stones that needed some more highlighting. For those, I just dipped my paintbrush a bit deeper and applied a bit of extra white paint to give some contrast.

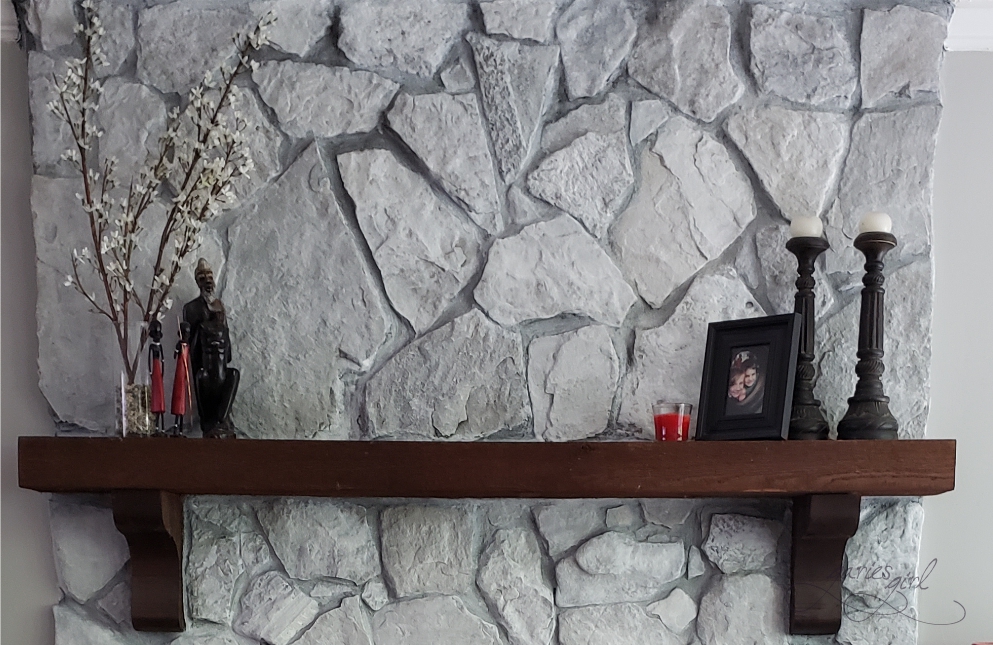
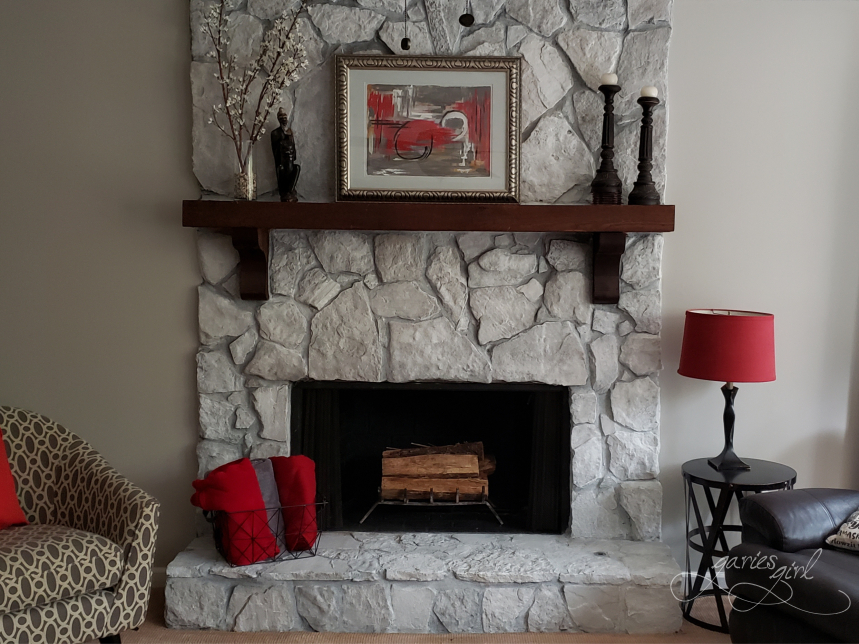
Styling the Mantel
Whitewashing the fireplace gave me the dramatic change I was looking for. Visually, it lightened up the room, but I knew I needed some more décor items up there to break up the white. Since this was one of my “as cheap as possible” projects, and I completed the whitewashing portion without spending any money, I sourced the rest of the house for items. The candlesticks came from the dining room table, and the small red candle from the foyer. I saw some really nice options on Amazon that would work for your mantel – check out this set of three wooden candle holders.
I chose a clear glass vase from my collection, filled it with small rocks, and added artificial cherry blossom branches for some height. You will also find some African Statues and Sculptures online. Mine was purchased on a trip to South Africa, but I was surprised at the number of options available online. The last item is a picture frame I already had. There are some nice rustic frames available online. This set of two photo frames will work for your mantel.
Remember to keep the decorating rule of three in mind. You can add in multiples of an item as long as they fit into an overall group of three items (like I did with my red statues below).
Artwork
I couldn’t find artwork to use as a centerpiece, so I decided to go look for something at my local thrift store. Almost immediately, I found what I was looking for – a nice silver frame in the appropriate size. The artwork was all wrong, both in design and color, but I thought I could do something with it at home. Of course, I also came home with some other odds and ends – more on their transformation later.
Updating the artwork was the last “to do” item for this fireplace makeover, or so I thought at the time. I removed the backing from the frame and took out the mount and artwork, which turned out to be glued together. I reused these and just painted my new “SJ Original” over the existing print. After the painting dried, it went back into the frame and up on the mantle.
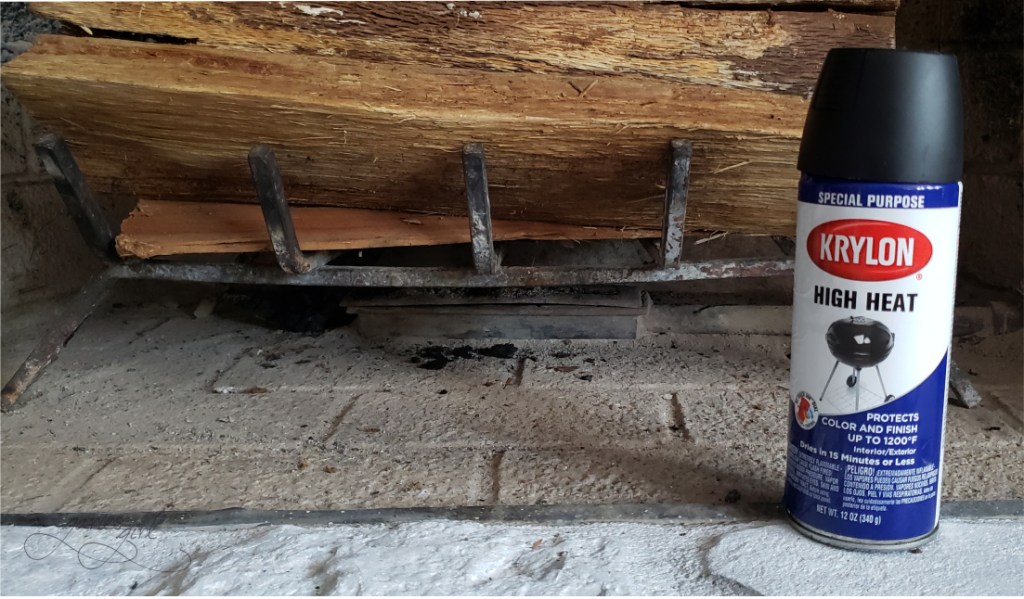
One Last Thing
And just when I thought I was all done, I realized the inside of the fireplace still looked horrible. Did you notice it in the pictures above? Especially with everything else so nice and clean looking. After staring at it for a while, I realized that spray paint would most likely fix this area right up. I had some on hand and gave the area two coats of Krylon High Heat spray paint.
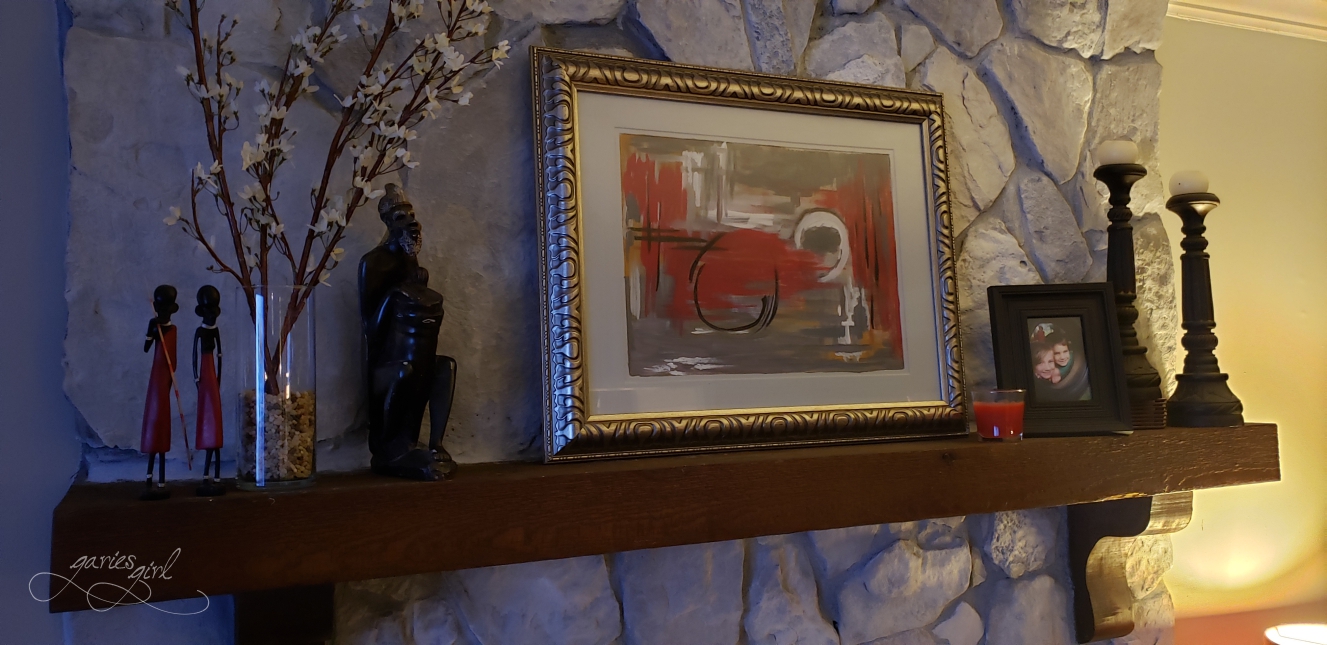
The End Result
I’m extremely pleased with how this fireplace turned out and even more so with how little money I spent on this project overall. Since I used paint and supplies I already had, the whitewash portion came to $0. I spent $13 on “new” décor items, which included the artwork, flowers, and the cute metal basket on the hearth. We did need a new key for the gas valve, and luckily found one of those on Amazon for $7. The rest of the items came from elsewhere in the house or were on the mantel originally.
The round metal side table is actually meant for outdoor use, but I liked how it looked here with my wooden lamp base and red oversized lamp shade. I did a mixture of plain red throw pillows, white and black throw pillows, and red and grey throw blankets.
I can’t wait to decorate this fireplace for Christmas!
Are you ready to update your fireplace? Go ahead, it is not as scary as it seems!

At first, I thought “Oh, no … that’ll ruin the stone” but it turned out that and I love the pops of red!!!!
LikeLike
Love how your fireplace looks! I’m going to take on the same project… thanks for the inspiration!
LikeLike
Thank you Lilia! Good luck with your fireplace!
LikeLiked by 1 person
Thanks so much for this DIY project you did. I am working on my Fireplace today. Same exact Stones and the color was the same yellowish, brownish. Thanks so much. Ill let you know when I’ve whitewashed it. You’ve have inspired me!!
LikeLike
Love this! Can I ask, what color paint and what paint finish did you use? I’m planning to do mine this weekend, but I’m not sure if I need gloss or matte paint.
LikeLike
Hi Jessica, I just used what I had on hand. It was interior semi-gloss paint. And I thinned it with water – half paint, half water. You don’t need a lot of paint mixture and can always mix more if you need it.
It felt all wrong while I painted and could see white stones next to the natural ones. But it was one of the fastest projects around my house and still one of my favorites! Send me a pic of your end result! Good luck 🙂
LikeLike
Hi!
The fireplace looks beautiful! I have a couple questions for you…I have a house built in 1980 with a very dark stone fireplace and I absolutely hate it. It makes my windowless livingroom look and feel like a cave. Do you think that your process would still work even though the stones a dark brown? Any suggestions for the darker stone? Thanks so much!
LikeLike
Hi Michelle,
Thank you – the fireplace update is still one of my all time favorites.
I would think your darker stones will need more coverage than my lighter stones. I would recommend doing multiple light coats though. I feel it is safer this way. Just know that painting those first couple of stones are the scariest! But once your first coat is on, you will have a better idea of what is still needed.
Good luck and I hope you will send me a photo of your finished project!
Sureta
LikeLike
Hi!Thanks for getting back to me! I haven’t gotten started yet. ð Part nervousness and part I need a stretch of time my teacher husband can help. Thinking maybe Christmas break. I attached a picture to show just how dark the stone is, and it’s almost the entire length of the livingroom. I’ll send another pic after I get the nerve to start!Thanks again for the help, Michelle Sent from my Galaxy
LikeLike