* This post contains affiliate links. For more information, please read my affiliate disclosure. *
The room swap idea hatched after winter temperatures made the room above the garage too cold to continue using as a bedroom. Sidney will move into my office and I will use her old room as my “new” office. Secretly, this was the room I wanted as my office from the start, so I was excited, to tell the truth 😉 The room being cold didn’t bother me at all – I work during the day and I have a small space heater that I can use under my desk if it gets too cold. Nobody was going to sleep there so it didn’t matter that the temperature dropped (a lot) during the night. Click here for the full back story.
We set aside one day to move all the furniture from one room to the other and my son Simon was willing to help move the heavier items. Our first focus was just on setting up my daughter’s new space. I would work at finishing up my office later that week.
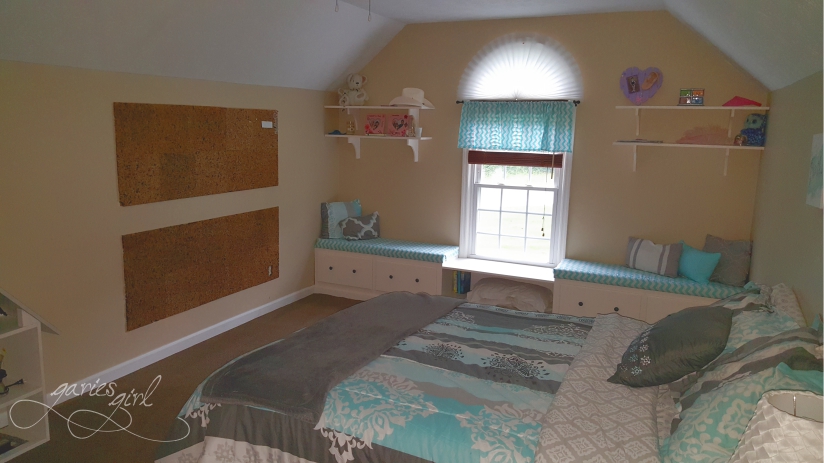
Sidney’s bedroom underwent some more changes after the initial room swap and here is the final version of her room (in case you missed that post).
My Office
All in all, getting my office to how it looks now, took much longer than a couple of days. To start with, I just could not find a comfortable spot for my main desk (yes, I have two desks in my office). I wanted to face the window, but that meant my back would be to the door. And the only window with a view was the one with the built-in benches. My furniture just felt awkwardly placed no matter what I tried. Once I let go of the “desk with a view” idea I got a much better floorplan. Which worked out great when I needed to find room for Sidney’s old bed in my office – but that is whole other post 😉
Let’s move on to what my office looks like today. This is my current Multi-purpose Office/Bedroom floorplan:
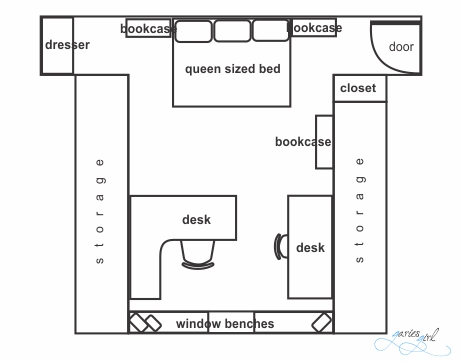
I divided the room into two areas: An office side and a bedroom side.
The Office Side
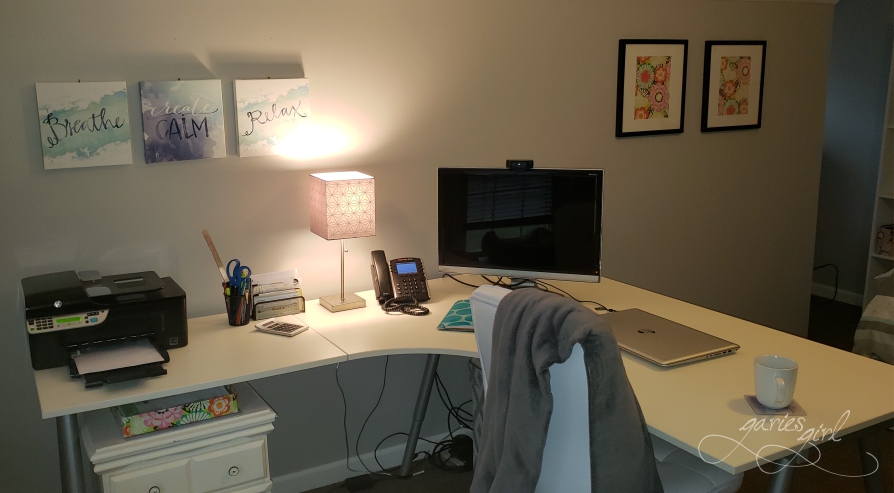
The office half of the room is also divided into two separate areas. An l-shaped desk serves as my main work area while my second desk is dedicated to my blog and hobbies.
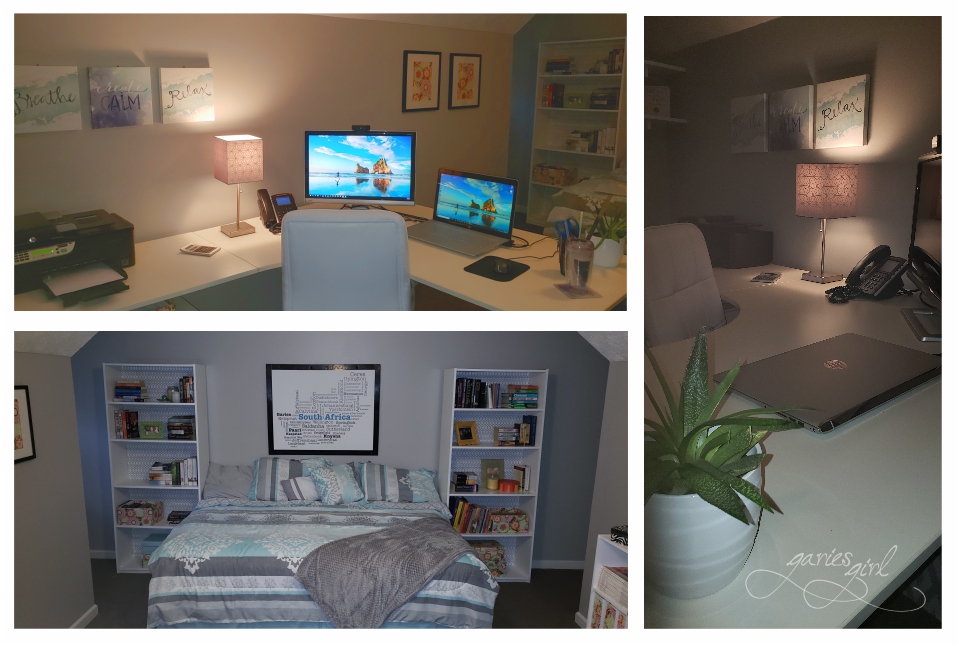
Both desks are pre-loved items that I bought online. I was so excited about finding my l-shaped desk since I’ve always wanted one, but didn’t have the heart to fork over hard-earned dollars for a brand new one. This one was only $60 (what a bargain, right?) and it was already disassembled when I went to pick it up. I single-handedly managed to get all the separate pieces up a flight of stairs and into my office and also put it all back together by myself. Yay me!
It didn’t come with any storage but since it is an Ikea piece I know I can add some Ikea storage solutions down the line. For now, I placed an old nightstand (that I was going to get rid of) under the left side of the desk. The nightstand gives me more than enough space for stationery and other items I use on a daily basis.
My second desk is a large table that I can clear when I’m working on bigger projects. Mostly, it is a place to work on my blog as well as a spot for kids to work on school projects.
The previous owners added some corkboards to one wall. After some inspection, I realized that it will be almost impossible to remove them without causing serious damage to the wall. Since I was not a fan of the look of corkboard, I decided to pretty them up using leftover fabric and some wood trim. What a big difference this made! For more details on my Corkboard Project, click here.
Unfortunately, my current furniture placement covers up the bottom corkboard, but knowing me, I will play around with the floorplan again someday…
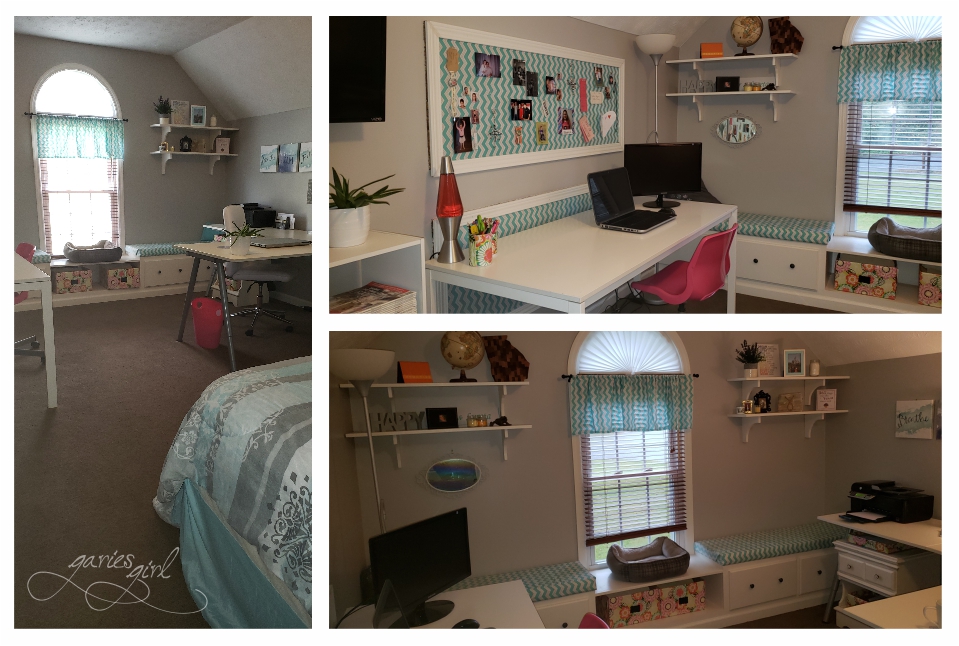
The Bedroom Side
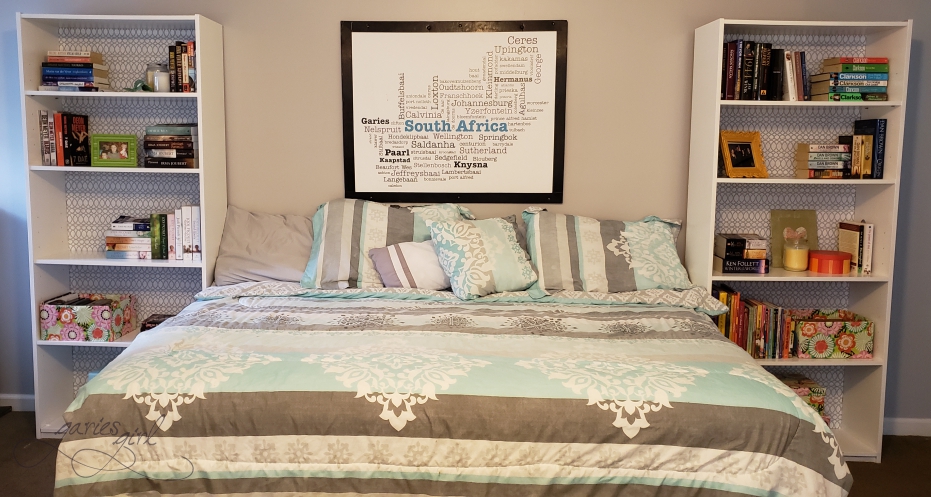
While the room is one of the largest in the house fitting in a queen-sized bed was not an easy process. I settled on turning the bed sideways (like a daybed) and flanked it with two tall bookcases.
These bookcases were another project that I finished recently. We originally got them from my sister-in-law and they were used as bookcases in our basement. They had to move upstairs when I had to make room for a pool table and my office seemed to be the most logical spot for them.
For them to fit into my office though they had to transform from brown laminate to white, pretty and clean looking items. You can read about my Bookcase Project by following this link.
I have taken a couple of Sunday naps here but having the bed in my office came in handy when my son gave up his room for extra house guests this past December.
Decorating the Room
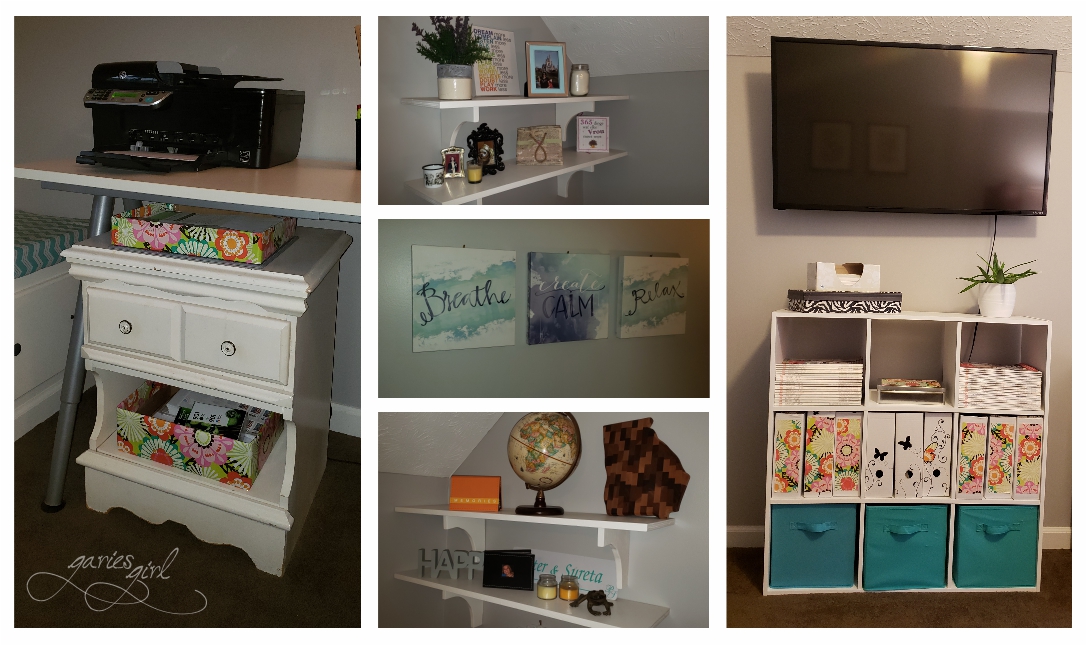
Since I normally decorate with colors (and usually just two colors per room) I decided to try something new in my office. While shopping at Publix a while ago, I came across some colorful gift wrapping paper. It had some of my base color (turquoise), but also some yellow, pink, orange and green. All mixed together in a cheerful flower design.
I bought a lot of rolls and have been using the wrapping paper throughout my office. I framed two pieces as art, used little bits on my magazine holders and even wrapped some salt containers in the paper. These containers now proudly hold my pens and pencils on my “hobby desk”.
I wanted to add some more baskets or bins to use as storage, but couldn’t find something I liked in my price range. As I unpacked my coffee k-cups from their box one day, I realized that the box was the perfect size to use in my office. Since then, I’ve wrapped many of these boxes with my flowery paper, and they are used throughout my office. I have two extra-large ones for my filing and use the regular size ones in my bookcases and in my closet.
The art above the bed is something I designed myself and I had it printed a couple of years ago. It is the shape of South Africa formed by the names of towns and cities. The town/city names were just arranged to fill the space and is not suppose to be an accurate map of the country (in case you wondered).
I placed my nine cube cubby cabinet (bought at Big Lots) under the television and it contains my South African magazine collection. Some are stored in the magazine holders (originally plain white and from Ikea) and some are stacked in the cubbies. I have three linen bins (also from Big Lots) that I use for storing electronics and cables (and some other random items).
The built-in dresser also got a bit of color in the form of labels. I used a combination of regular paper and my flower wrapping paper to create a label for each drawer. This is where I store extra school supplies, more computer cables, gift bags and again, some miscellaneous items.

The closet is still a work in progress. This is being used mostly for storing my hobby supplies, photos, gift bags and wrapping paper, older filing and random bits of our past. Most items are grouped and stored in more wrapped k-cup boxes. I also added two strips of LED lights to the closet. I found them on Amazon and they have a neat motion sensor function. They automatically turn on when I open the closet door and provides plenty of light to a previously dark closet.
Well, there you have it! What do you think of my multi-purpose home office/nap space?

3 thoughts