* This post contains affiliate links. For more information, please read my affiliate disclosure. *
It has always bothered me that you can see underneath our deck from the road. Not that I have anything to hide, but everything we stored down there was out in the open for all to see. I try to get rid of items immediately, but sometimes things have to stay a while until I can safely do so. For now, we have an old grill and an old umbrella down there. Where do you even take those types of items?
In the pictures below, you can clearly see all the way through to the neighbors. Did you notice my shade sails and string lights on the deck? They’ve been holding up exceptionally well and will look so much better once I can cover the side of our deck.

Two trees came down in our back yard early November, narrowly missing our house and just hitting the far corner of our deck bump out. After the huge cleanup effort, we were left with a bunch of tree stumps. Actually, we decided to keep the stumps. Since we now have two firepits (one in front of the house and one on the downstairs patio) they will come in handy once they are completely dry. In six months’ time, if I understand correctly. All of this wood had to go somewhere and preferably be out of sight. Under the deck made the most sense for just that very reason. And also, since I was the one stacking the stumps, not too far to carry from where they were cut.
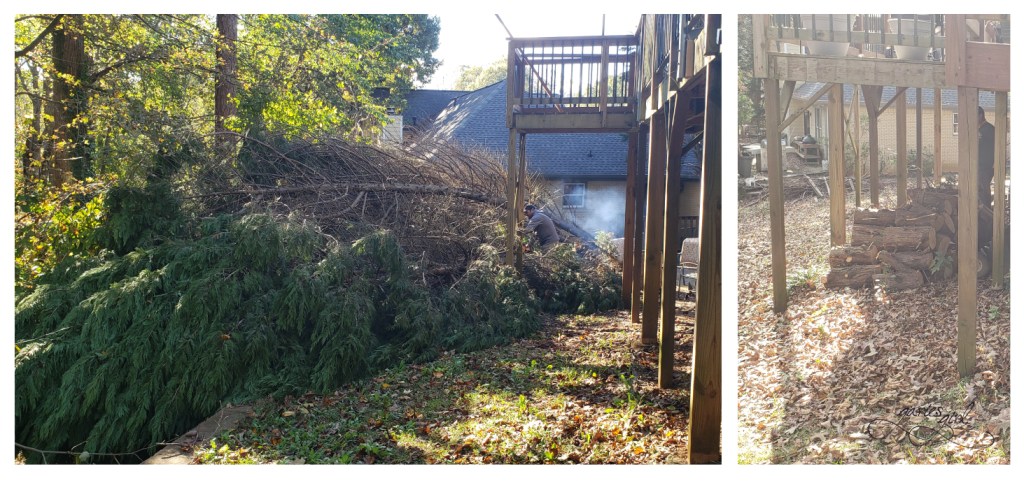
So, as you can see, besides the grill and umbrella, I also have drying wood stumps stored under the deck.
The Plan
I really don’t like the look of the lattice panels most people use. As always, I found my inspiration on Pinterest. My saved pin had horizontal boards behind the deck posts, and they were stained the same color as the deck. With the way our deck was built, it made more sense to place our slats on the outside of the posts. Besides, the posts aren’t stained and don’t look very pretty. Our deck railing is made up of vertical black metal slats, so I opted for horizontal boards to create some visual balance. And I was going to paint ours black. Pieter double checked that many, many times while we were out supply shopping, but I stuck to my guns and we came home with a gallon of black paint.
The Shopping List
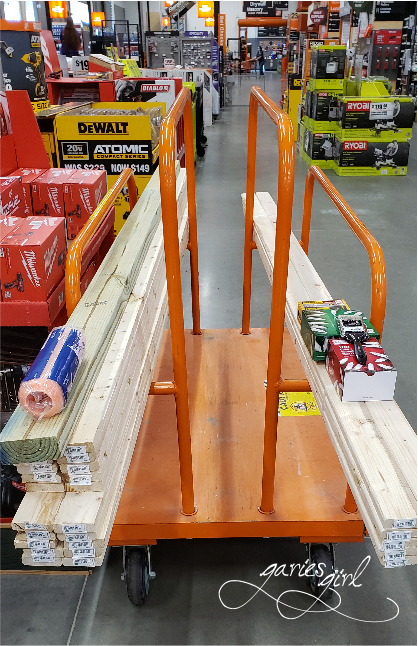
We bought 2×1 pine boards that were (almost as if it was planned that way) the exact length we needed for the two main areas we wanted to cover. The third area was smaller, which means we will be doing some cutting. Which is also okay, since not all the boards were perfect in appearance.
TIP: Take your time and choose your boards in the store. Look for the straightest ones with the fewest knots. They also come in bundles of 10, but then you don’t know how straight the ones in the middle of the bundle are.
- 40x 2×1 inch pine boards
- 1x 2×4 inch treated pine board
- 2x boxes of 2-inch 1lb screws
- 1 gallon of paint
- 1 new paint brush
Prepping and Installation
We installed our boards over a couple of weekends. Mostly because I wasn’t done painting them all, and we had to deal with some rainy weather. I painted the first 30x boards, giving each board two thick coats of black paint. Painting something black is a bit more difficult than I imagined, especially if you are not working in natural light. I had my boards laid out over two sawhorses in the garage and would paint one side, wait till it was dry, flip it over, and paint the back side. I tried to get the edges at the same time, but noticed that this was where I had the least amount of paint coverage. My solution was to flip the boards over onto their edges and paint them some more.

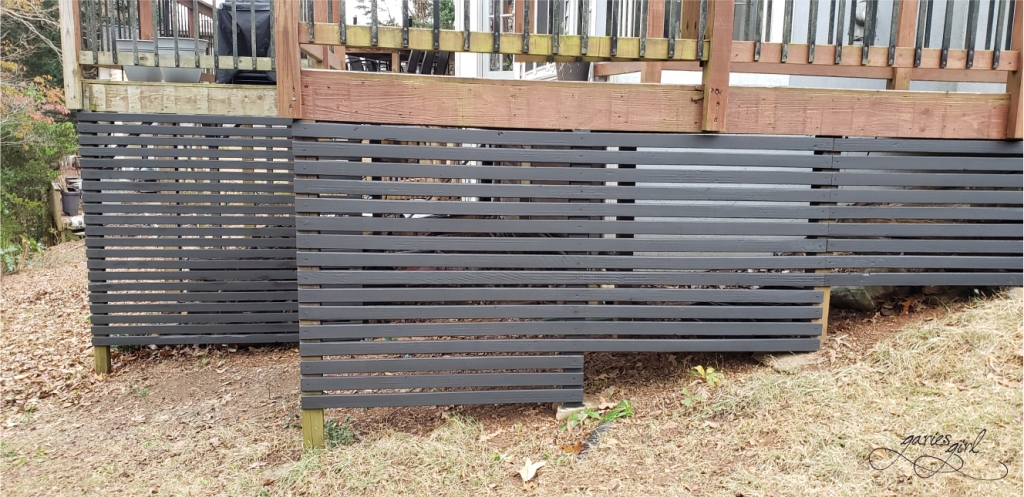
Installation was as simple as lining up the boards and screwing them to the deck posts – one screw on each end. We used a smaller piece of 2×1 board as a spacer, inserting it between boards as we went to give us consistent spacing. As I mentioned earlier, one side of the deck used the full board lengths for the upper areas. We worked our way down from the top until we couldn’t add any more full-size boards to the space between deck posts.

We used two sections of the treated board as additional supports. Placed on some cement blocks behind the horizontal boards, we screwed them into the top deck plate and secured the boards to them from the front using more screws. This allowed us to add additional boards to cover up the rest of the slope as much as possible.
This is what it looked like without the support pieces:

And here you can see the additional support pieces:

After prepping some more boards, I was able to take final measurements and start the cutting process for the sloped area. We used our battery-operated circular saw and pre-cut all pieces needed. Yes, we did measure twice and cut once, lol. These shorter boards went on over the bottom open areas between the posts and our new supports.

The last bit of our project that needed boards was set back a bit. We had a shorter span here, so we pre-cut boards, repeated the paint process, and screwed them onto the deck supports.

Touch Ups
I waited for some warmer weather and went back with my paint and paintbrush to do final touchups. Since we didn’t use pretreated outside wood, I really wanted a good paint cover for as much protection as possible. I also covered all the screw heads with paint. The yellow pops of color that they gave were just not the look I was going for. I painted the new vertical supports too, so that they could “disappear”.
Since Winter is around the corner, I will wait a bit with additional touchups and planting. The plan is to create a flowerbed in front of the slats and plant some greenery. This will help to cover up the remaining open areas created by the slope.
About that grill we were storing under the deck – Pieter decided to repurpose it and spent one Saturday giving it a makeover. Read all about that project here.
What do you think? Ready to cover the sides of your underdeck area? Maybe we should make the underside waterproof, and then we can really store some things down here. Wonder what Pieter would think about that…
May 2021 – Update!
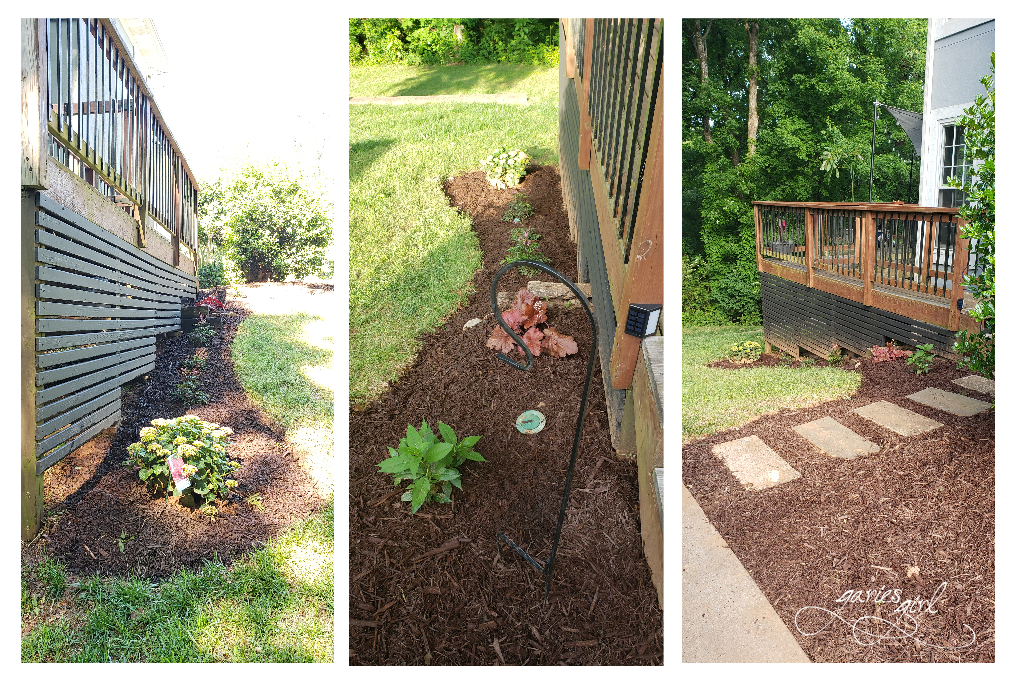
I completed a flowerbed on this side of the house, and it made such a big difference to this area! I am beyond pleased. And even happier now that my new hydrangea is showing its bright pink flowers. Here is the area before I added the flowerbed:

And here is the after – so much better! It took most of a Saturday and a lot of help from my trusty Gorilla Cart to get this done, but I love my new flowerbed. The final project here was to add lighting right by our steps. We installed some outdoor solar lights on the railing posts. These lights can also work as perimeter lights on the deck or around the outside of your railings.
You can also see where I used the remaining boards vertically to cover up our trashcans – just to the right of the steps leading up to our deck. Read all about that in Hide your Trashcans.


Looks great!
LikeLike
I love the look of your horizontal boards. Very nice! I’ve not had lattice skirt on a deck so was just thinking that was the way to go. I’m going to consider your idea!
The planting you added is lovely! Do you have an edger installed or just keep it trimmed by the mulch. I’m sure by now those plants have filled in wonderfully!
We are building a new deck this summer. Won’t have the amount of slope that you do so will talk with my husband/builder about this idea. Thanks for posting!
(I recently saw an idea for old patio umbrella spines. Hmmm…. Back to Pinterest if you still have it? Maybe in the garden for climbing vegetables. #thinking I didn’t keep it front & center b/c I don’t have one! )
LikeLike