* This post contains affiliate links. For more information, please read my affiliate disclosure. *
Updating closets are sometimes the last item on everyone’s DIY list. Most of us keep our closet doors tightly shut when we have company over and feel it is not really important what it looks like on the inside. If you do peek inside those closets, you will likely find paint color from the year the house was built (and I now know why!!!, but we will get to that later). As if that isn’t bad enough, there is never nearly enough shelves or hanging space for everything you need to fit in those closets.
Don’t even get me started on pantries. If you are lucky enough to have one of those pantry closets, they are usually severely shelve challenged and could function so much better with some minor changes and/or updates.
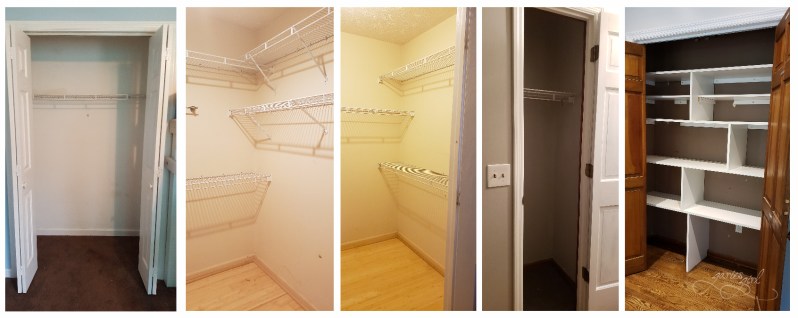
Our current house suffered from builder grade closets. The kids’ closets each had one wire shelf with a built-in clothing rod. When we moved in we added fabric hanging shelves but the weight of their clothes quickly turned those into saggy eyesores. While the closets in the master bedroom also had wire shelves, their size and layout made it more workable. No need for fabric hanging shelves in these areas. The pantry had solid shelves but their spacing left a lot of wasted space.
Before (from left to right): Kid Closet, Master Closets, Hall Closet and Pantry
Painting Your Closets
When you paint closets yourself, you have two options: Remove all shelving and roll on the paint or keep all shelves in place and cut in around them with a paintbrush. If you remember anything from this post, remember this: cutting in takes forever! If at all possible, remove those shelves. Trust me, you will be so happy you did.
When I painted our walk-in closets I removed the shelf support brackets but left the wire shelves in place. I thought it was going to be too difficult to remove the shelves themselves and just resigned myself to painting around them. While it did take much longer this way, it wasn’t such a horrible way of doing it, since the closet was roomy enough where I could get to all the hard to reach places with my paintbrush.
Contortionist Painting
Our pantry closet was a bit more difficult. I just completed painting the inside of it and since those shelves were not removable – I had to cut in around all of them. It took forever (or felt like it at least)! Besides painting all of the inside walls with a paintbrush (there was no space to use a roller) the most difficult part of painting the pantry was trying to reach the top corners while squeezing my head and arms into very small areas. This is why I think people just leave these closets the color they are and don’t bother to paint them at all.
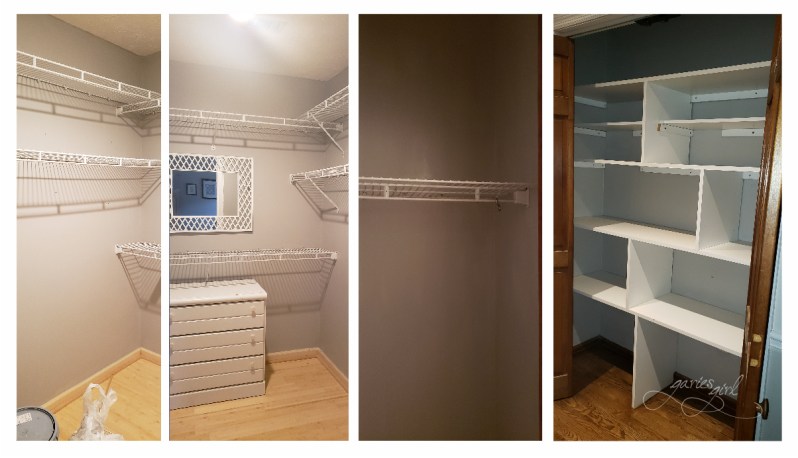
After (from left to right): Master Closet, Hall Closet and Pantry
Add Shelving
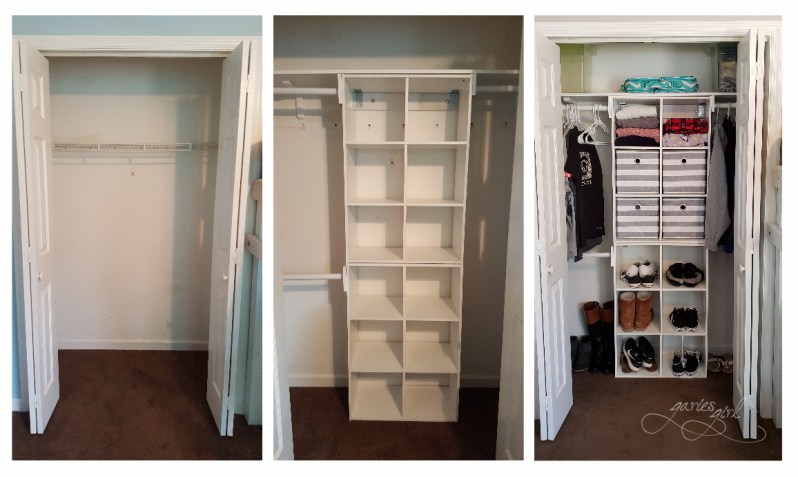
The kids’ closets were the first to get mini-makeovers. We knew we had to add shelving if we wanted to make their closets a little more functional. My plan was to add cube shelving to the middle of the closet, one horizontal shelve on top of that and three hanging rods. I found affordable cube shelving at BigLots and bought them using my 20% off coupon (score!). I assembled the units and Pieter helped connect them together – one on top of the other.
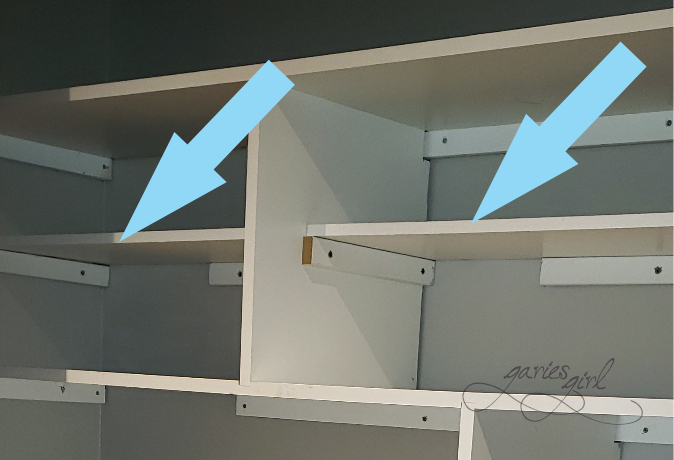
We fastened this to the back wall and once that was secure added a solid shelf to the top. This we had to support on both sides with wood spacers fastened to the studs. We purchased clothing rods at Home Depot and added these to the closet. Quick and easy. The end result is a much more usable closet with plenty of storage. The cubes are perfect for stacking t-shirts and shoes. We even added the little linen drawers for keeping smaller items like socks grouped together.
We repurposed the wire shelving that came out of the kids’ closets. Pieter added those to my walk-in closet. I now have additional shelves that I haven’t even filled with anything yet!
The pantry only needed one additional shelf. My storage containers were stacked on top of each other and by adding the shelf, I was able to create two rows of containers that easily slide out so you can get to the contents.
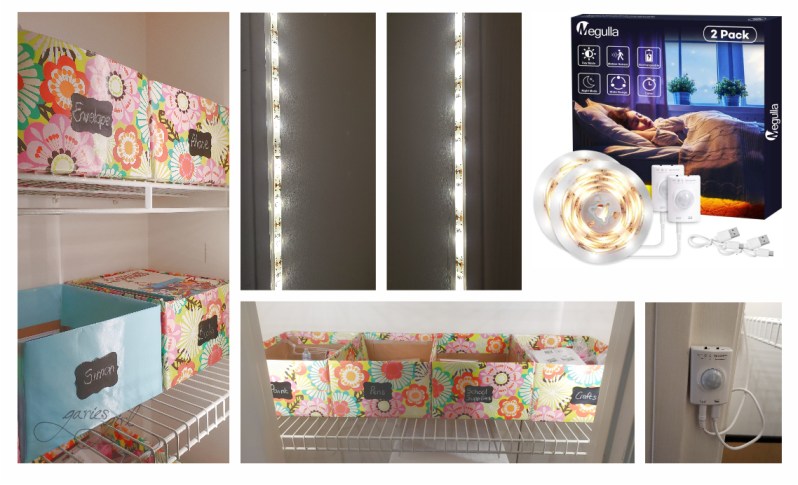
Add Lighting
Besides changing the paint color and additional shelving, you should really consider adding some lighting. The closet in my office was really dark. It is around the corner from the main ceiling light and by opening the closet door you blocked out the natural light from the foyer. Amazon to the rescue (again)! I found a great product online and it included a motion sensor. These led strip lights are very similar and currently available online. No need to worry about turning them on! I open the closet door and they turn on by themselves. What made these very cool in my opinion was that they have a very long battery life and when needed, they can be recharged via USB cables. I installed them over a year ago and so far only recharged them twice.
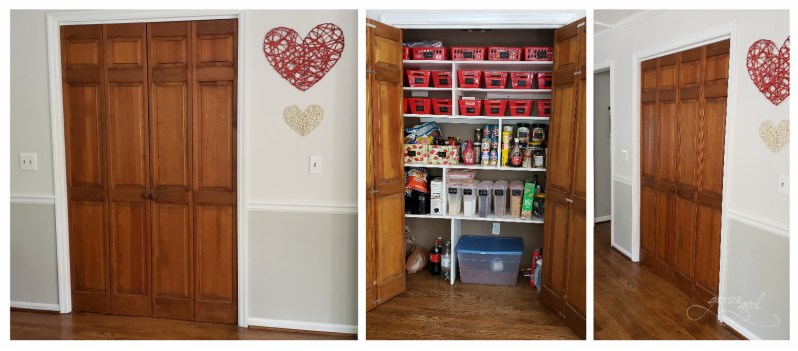
Change the Doors
This was one of the first projects we did in this house. The pantry had bifold doors which when open, made getting anything from the corners of the pantry a challenge. I felt the doors would function much better if they could open like regular doors. We removed the door panels from the pantry, used brackets to fix two panels together and reinstalled them. We added a magnetic latch and now the door stays closed. Added bonus: they still look like bifold doors, but function like regular doors.
You might notice that I left them the natural wood color. I have to say, I was tempted to paint them white, but realized we “touch” them too often. I didn’t want to deal with unnecessary cleaning if I didn’t have to.
Organize your Closet & Pantries
I love an organized home and my closet and pantry areas reflect this pet peeve of mine.
After painting the closets in our master bedroom I had the perfect opportunity to go through all our clothes and set aside items we no longer wore or needed. Most were good candidates for donating and went directly into the back of my car. That way I can drop them off on my next errand run.
The rest were grouped together according to season and type. The amount of shelves and hanging space in my closet allows me to hang most of my clothes. On the left I have shirts and on the right pants, jackets and dresses. I fold my t-shirts and pants and they go on the shelves. All my “nicer” shirts are on hangers. I also try to keep like colors together. Since I already own so many white plastic hangers, I decided to reuse those. I sorted those as well and one type went into my closet and the other into Pieter’s. We each have a small dresser and I added a mirror and removable shoe shelves to my closet. Nothing fancy, but very functional.
The picture below is immediately after I painted and moved all our clothes back into our closets. Since then, I’ve made some more adjustments and have plans to add a “pop of color” to the back wall of my closet. UPDATE: I completed that project recently – here is the link: DIY Wall Stencil

I organized my pantry using plastic containers from the Dollar Store and boxes I have been saving. To create a unified look, I covered all my boxes with wrapping paper that I also picked up from the Dollar Store. I added some adhesive chalk labels and use the boxes to store “like” items together. When your pantry contents are organized you can see at a glance what you have, what you need and your whole family can grab what they need without asking for your help.
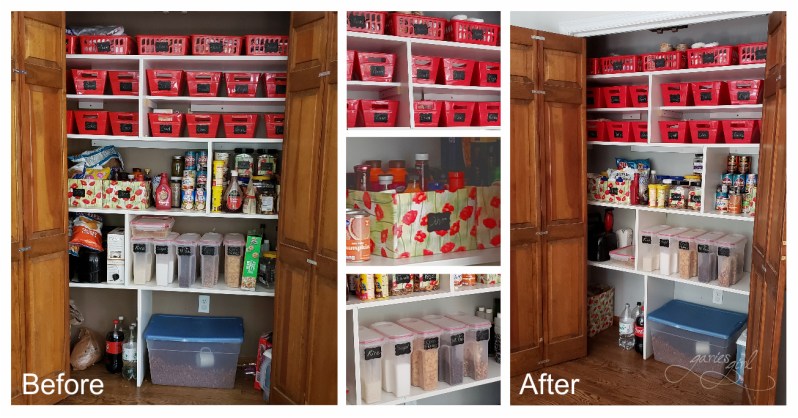 While I know there is still room for improvement (there always is) I am happy with the current state of my pantry.
How have you updated your closets?

One thought