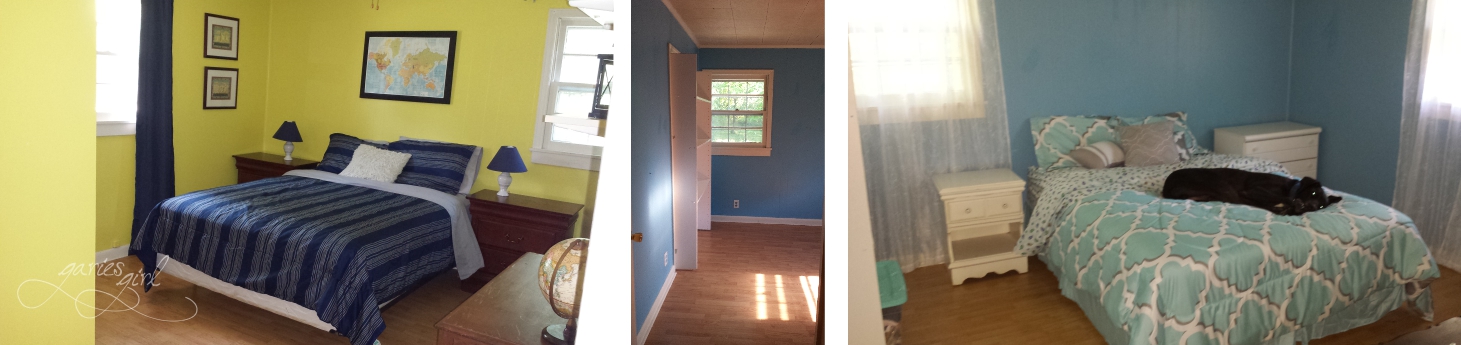
The kids basically ended up with their own wing in the new house. Three good-sized bedrooms (one with an en-suite half bath) were located down the hall. We kept the weird green room as a guest room, and Simon got the room with the half bath attached. When we bought the house, we were surprised by the strange shelving on the wall between the two bedrooms and soon figured out that these were hiding a door opening that originally connected the two rooms.
The yellow room was to the left of the hallway, and the blue room was to the right. The white shelving can be seen in the middle picture.
The Plan
While I don’t have anything against blue and yellow as paint colors, it was just too much for me to live with. If you’ve read some of the other room updates, you know by now that I do have a grey-and-white theme, so there wasn’t much debate about what needed to happen in these rooms. Before we could paint though, we had to fix the shelf-wall, and also update the closet doors. Simon’s bathroom also had a leaky faucet we had to fix.
The New Wall
First, we had to break down the strange shelf wall. We removed all the shelves first and were left with a piece of melamine that covered the hole where the door used to be. Once that was also removed, we could start the wall rebuild. Pieter used 2x4s and constructed a new wall that would fill the existing space. We found matching wood panelling at Home Depot (yes, they still sell wood panelling), and cut two pieces that would cover the space from both sides, and fitted that to our newly built stud wall.
This project drew quite a doggy audience!

I have to admit, we got it wrong the first time. Our new pieces of panelling did not fit properly and no amount of smoothing got them to look 100% right. The only solution was to take them down, trim them some more, and reattach them again. This time, it looked much better. I used drywall compound to fill the gaps and started painting.
Painting
Both rooms got a couple of coats of grey paint, and all trim and molding were painted white. I had to add additional coats to the new wood paneling, but after the final coat, it finally looked like it has always been there.
Closet Doors
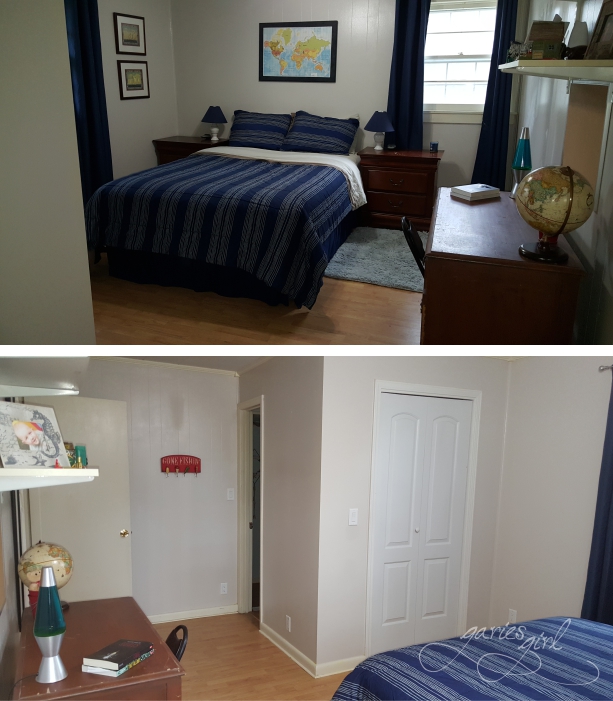
Both rooms had louvre-style closet doors, but they were the wrong type of white, not to mention a bit outdated. They just didn’t fit the new look. We replaced both with new doors from Home Depot, that opened to one side. This made the closets much more functional.
Finishing Touches
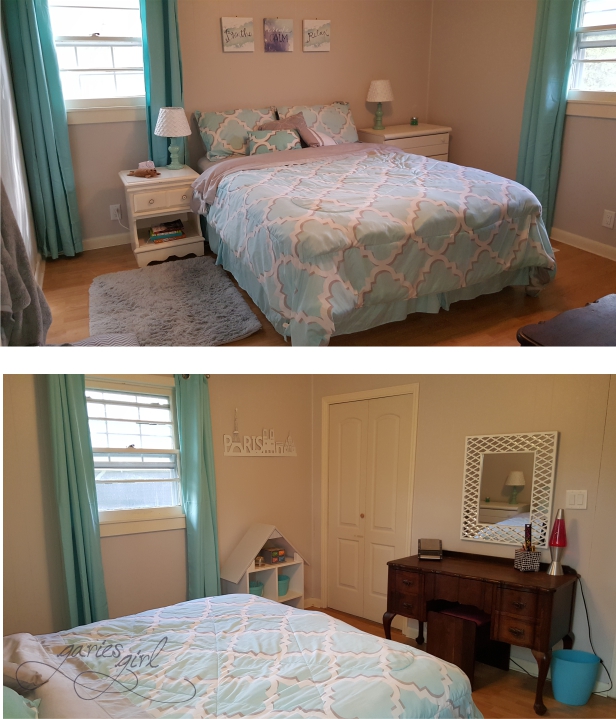
While the sheer white curtains looked okay originally, I needed some color against the grey walls and something that would provide more privacy for Sidney. I found a perfect solution at my local Fred’s for very little money. I bought four turquoise panels and they provided a nice pop of color. I also bought a new white framed mirror to go above her vanity table, and some artwork to go above her bed.
For Simon’s room, I only added an extra curtain panel to each of the windows. I originally bought his curtains at Walmart and was very happy when I went back and found two more a couple of years later.
Both rooms ended up looking much cleaner and brighter. It was time to face the Laundry Room!

One thought