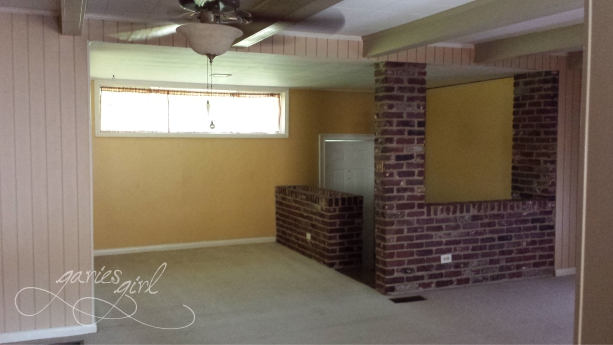
Our living room had a nice open feel, and with the upper kitchen cabinets gone (Pieter and David removed those right after we moved in) it had a great connection to the kitchen, dining room and the little office nook at the front of the house. The biggest challenge here was all the different wall textures – more wood panelling, brick, drywall and even some beadboard on the kitchen side. And not to mention, too many different (and frankly, horrible) paint colors!
Updating the Furniture
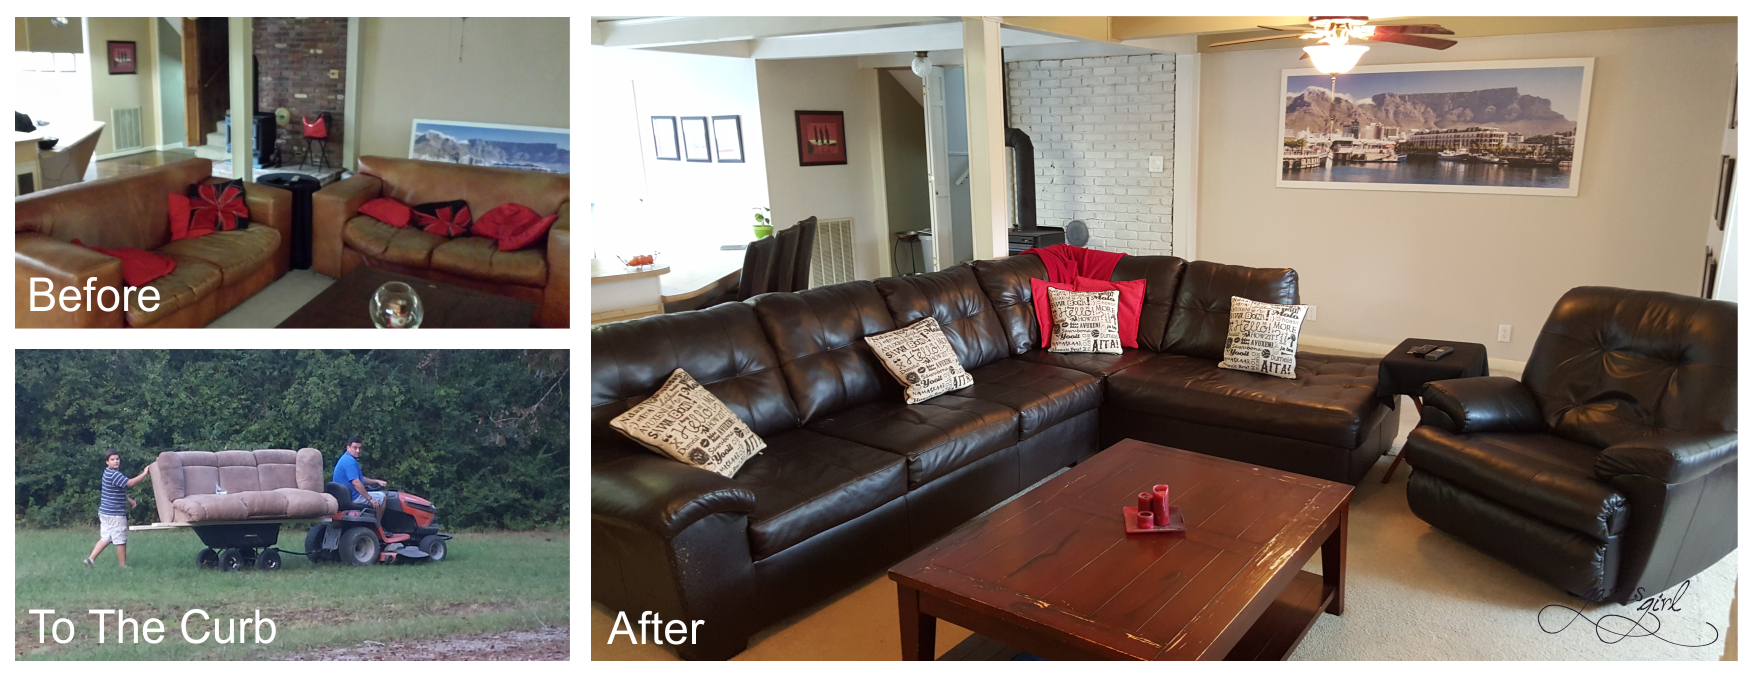
While our existing furniture did fit the space very well, we needed some extra seating in the living room. So soon after moving in, we went shopping for a new sectional. This, along with a matching recliner, gave us the extra seating we were looking for and created a more defined seating area. It was time to say goodbye to our original Goodwill couch, and it was moved to the curb (it was really funny to see it leave on the cart behind the riding mower). Simon helped me move our old leather couches downstairs and they became the new seating in the kid’s hang-out / gaming space.
The Foyer
The foyer floor had some peeling vinyl tiles and a lot of red brick. I removed all the tiles and painted the concrete floor dark grey. I also cleaned up the ugly built-in planter box. I didn’t want to fill the whole thing up with potting soil, so I just added four smaller potted plants, that didn’t require a lot of natural light. They brought some much-needed life to the area.

The Office Nook
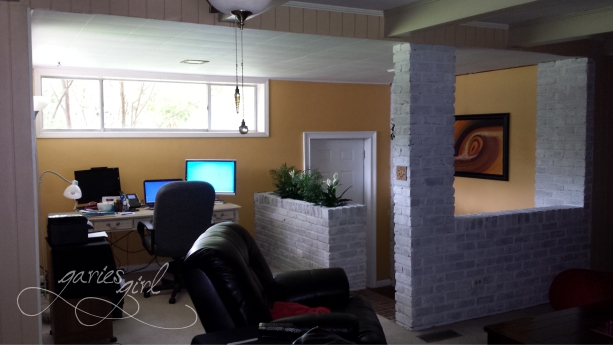
There was no dedicated office space in this house and I didn’t want to use the guest room as an office. All our friends had plans to visit us at some or other time, and I needed the guest room to always be ready for guests. That left the strange open space at the front of the house as the only option.
The area had two wide but narrow windows up high, which gave me enough space for a desk below. The windows were covered with very outdated and dark curtains. I took them down and decided to not replace them with anything else. They were too high for anyone to look in and besides, we didn’t have any neighbors on that side either. Later, when we added two kittens to our “farm family”, this became their favorite world/bird-watching spot.
Paint & Whitewashing
As with most of the house, it also desperately needed a new coat of paint. I chose another light shade of grey, with white for the trim, doors and ceiling beams. The room had two dark red brick walls, which did not help to lighten it up at all. I decided to whitewash them.
Again, Pieter thought this wouldn’t look good at all, but I was determined to try this. If it didn’t look good, I could always paint them grey as well. The whitewashing process took a while to complete, but once done, it looked so much better. I just used my leftover white paint, added a bit of water and brushed it on. In all honesty, I didn’t even wipe it down afterwards. I applied a thin enough coat which allowed me to skip that step and saved me some time.

Final Touches
Again with the outlets! This room also had a strange collection of outlets and light switches. I went ahead and replaced all of them, with some help from the kids. One kid placed the covers and the other one fastened them.
All our original artwork fitted nicely in the space when we moved in and looked even better once I finished painting the walls. I picked up some throw pillows on my last trip to South Africa and loved how they looked with my red accents.
Next on the to-do list – the Dining Room!

2 thoughts