
* This post contains affiliate links. For more information, please read my affiliate disclosure. *
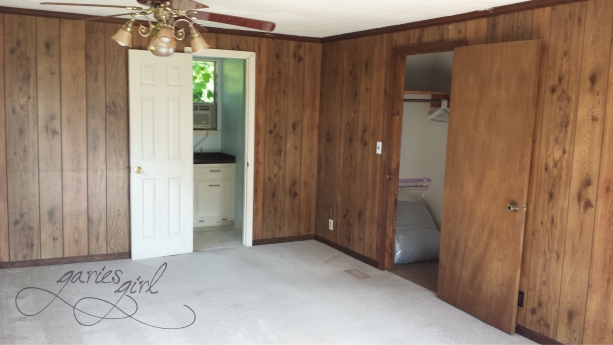
For some or other strange reason, our new master bedroom was the only room in the house with really ugly wood paneling. None of the previous owners or renters thought to update this. Were they not bothered by it? The panelling, paired with purple and blue walls in the bathroom, mismatched doors and an awful ceiling fan, made for an outdated, dark and depressing master suite. It did have a couple of things going for it. It was a good-sized room, located on the other side of the house from the other bedrooms. The carpet and ceiling were in good shape too…
Painting the Wood Panelling
I spent a couple of hours on Pinterest for inspiration and settled on a grey, white and yellow color scheme, with some black accents. The first item on my Master Refresh To-Do List was painting the wood panelling. Paint still is the fastest and least expensive way to update any room, in my opinion.
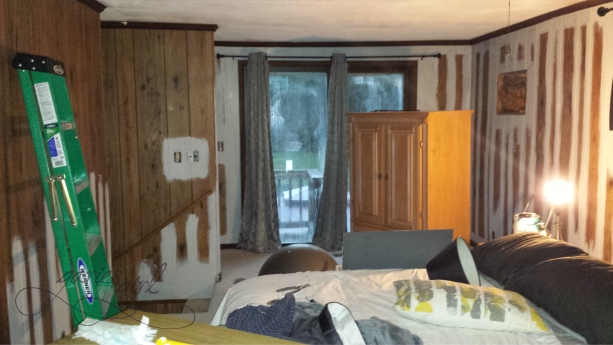
I chose a paint with a built-in primer and applied two coats to the walls. I used a paintbrush to get into all of the panelling grooves (a bit more time consuming) and then rolled on the two coats. Lucky for me, I didn’t have to repaint the ceiling, but I did have to paint the wood-colored trim and baseboards, as well as the stair railing. I chose a plain white color for these, and it not only brightened the room but also modernized the bedroom.
Accents
I couldn’t find short enough curtains for the narrow windows above the bed, so I bought the shortest ones I could find, and just shortened them some more myself. I picked black, to make sure we can keep the room dark for when we wanted to sleep in – like that was going to happen with our ambitious list of projects! The sliding door got grey patterned room darkening curtains that I found at Big Lots. We desperately needed it on this side of the room, since it was getting full afternoon sun. With the curtains closed, I was also able to keep most of the afternoon heat out.
The Bathroom
This is what we started out with: purple walls, a dark countertop and strange wood framed mirror/medicine cabinet. While overall not too bad, I realized that I needed to spruce it up just a little bit, until we could do a full remodel.
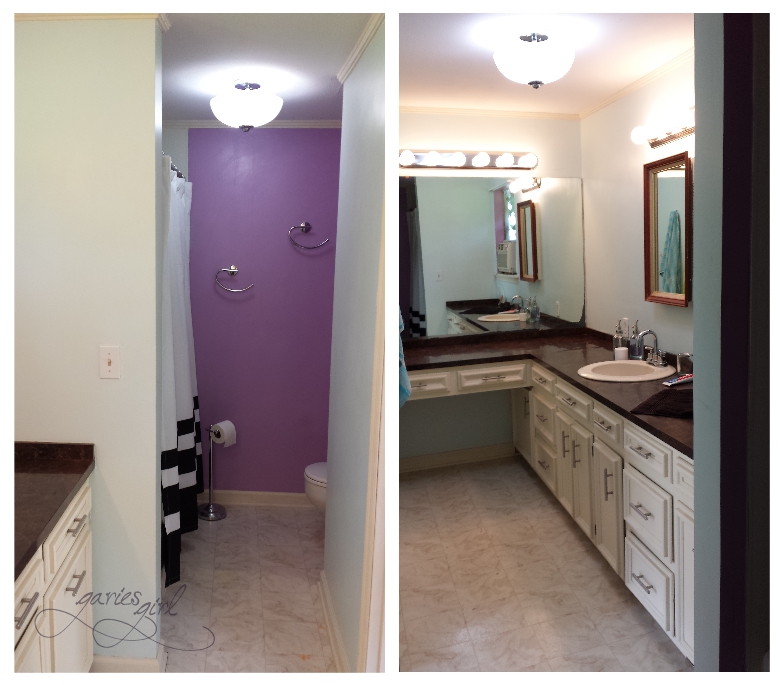
We continued the bedroom color scheme into the master bathroom, with the same grey paint on the walls, a new shower curtain and some yellow paint on the small mirror/medicine cabinet frame. I reused some older black picture frames and inserted yellow patterned paper for another pop of color.

Ceiling Fan & Closet Doors
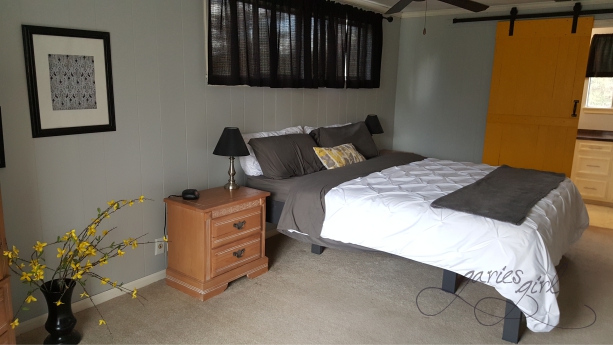
The ceiling fan was another dated eyesore in the room. We swapped this out with a plain ceiling fan, without an overhead light. We were limited on ceiling height and this gave us the extra visual space we needed above the bed.
We also replaced the brown closet door, with a new white one from Home Depot.
Sliding Barn Door
The bathroom had a narrow door, that I decided to remove and replace with a custom sliding barn door.
This gave Pieter a chance to break out his new power tools again and build our very own door. I settled on the design and gave him the measurements. Once he finished the door, I took over and painted it bright yellow. Pieter was a bit sceptical about my color choice but he also knew he wasn’t going to be able to change my mind. He did love the way it all came together in the end though.
We ordered a very reasonably priced – less than $100 – slide mechanism and door handle from Amazon. While it isn’t available anymore, this slide mechanism is even less expensive and looks exactly the same! This was a really great buy. With David’s help, we installed the tracks and door that same weekend.
Finishing Touches
I’m pretty sure our master bedroom and the living space below, was an addition to the original house at some point. Also, most likely, a do it yourself project for the previous owners. For some strange reason though, the master was finished with an odd collection of electrical outlets and switches. I counted 5 (!) different types. And I’m talking really old, really ugly ones.
I’m not an electrician, but David convinced me that this was easy to change. I prepared an outlet shopping list, and we went to Home Depot for supplies. Before starting to replace them, we did turn off the power to the whole house. This became another family task, with all 8 of us replacing the outlets and switches. We created an assembly line of sorts, and while sweating a good bit (no power = no a.c.) replaced them all in a couple of hours.
Even though this might seem like a small and maybe not necessary detail, it made a huge difference in the overall look.
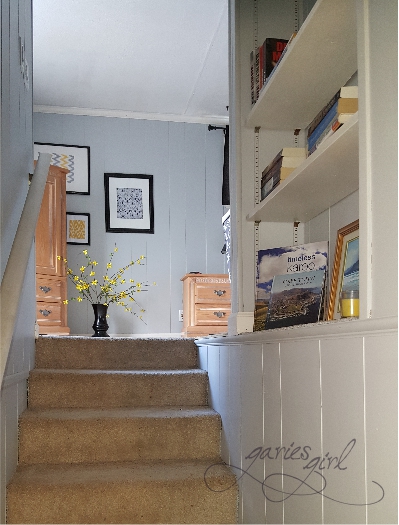
The final area that needed fixing up, was a small bookcase next to the stairs. This was also painted white and grey and I decorated this with some of my favorite South African books, picture frames, candles and artwork.
Did I mention we also built a new bed? For sure we did! I created a whole separate post on that process, so read all about that before we move on to the living room project. Building a new Bed.

One thought