We went camping this past weekend to celebrate my birthday (yep, another year older) and thought it would be fun to create a couple of “tour” videos for you. You will find the links to the videos below, but I thought I would also create this post for those of you who like to read!
We bought our RV at the end of 2017 and have not been able to use it as often as we would have liked. But we are working on that this year and hope to do many trips before winter. Since it hasn’t been used that often yet, it is still in excellent shape, inside and out. Earlier this season we gave it a good cleaning – had to wash away some storage dirt and streaks – and it is stocked and ready to go whenever we have a weekend open. Read what product works best on those stubborn black streaks!
Type of RV
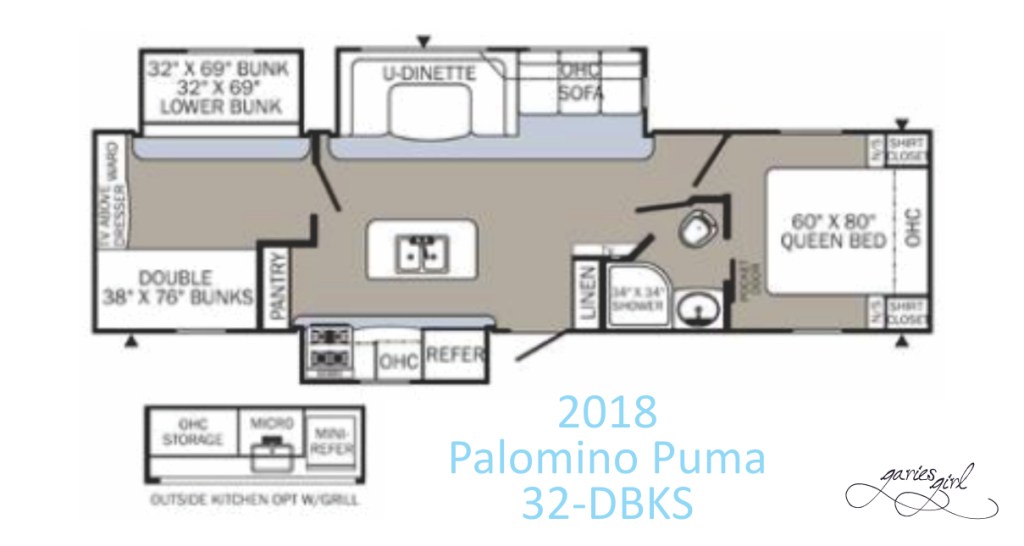
We have a Puma by Palomino RV, or like they are called here, travel trailer. The total length is 36 feet (about 11 meters) and total width is 8 feet (2.5 meters), so quite large. The sleeping capacity is right at 10 people, although, I’m not sure those would be 10 full size adults. This RV includes 3 slide outs – 2 in the main living/kitchen area, and 1 in the kids room. The RV is actually not livable without these pushed out all the way, but since this is done by pressing a button, we don’t mind at all.

We picked this model specifically because it had the bunk house addition – a separate room in the back for the kids – a kitchen island, an outside kitchen and for Pieter, two aircons. Since space at home is limited, we rent a spot at an RV/boat storage facility nearby. When we want to go camping, we pack our food and clothes, drive over and hook it to the truck, and head out to our campsite.
The Outside of the RV
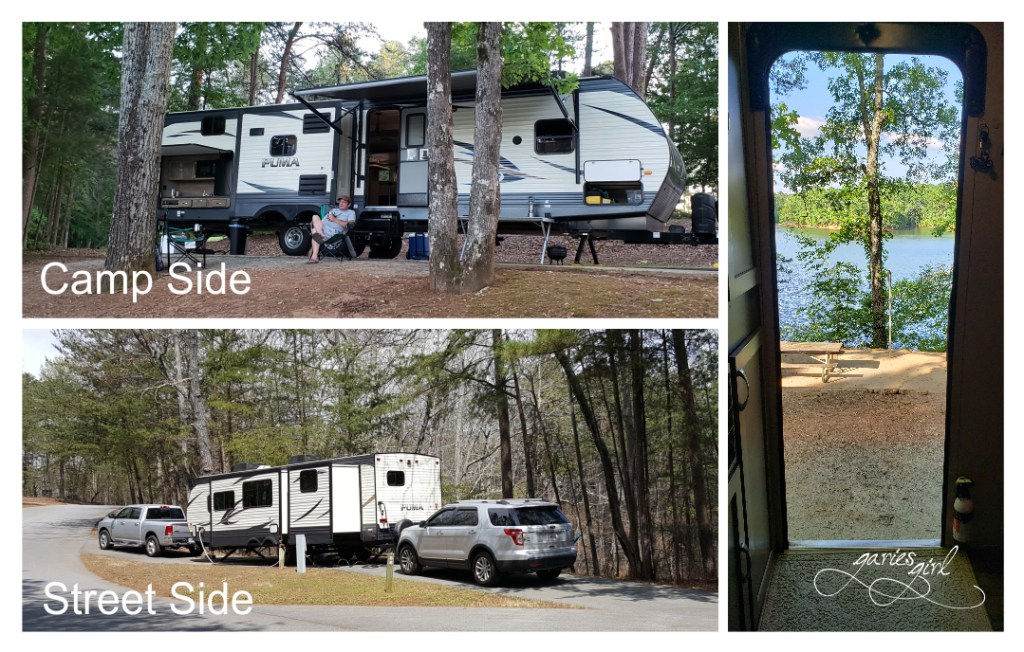
With this type of RV, you have a “street” side and a “camp” side. It just means that you will usually position your RV so that the “camp” side faces the view, as we did on this past weekend with our beautiful lake view. The door and awning is located on the “camp” side, as well as the kitchen slide out and the outdoor kitchen.
Our other two slide outs and the water and electricity hookups, are on the street side. Once you are all set up for camping, you hardly have to go to the “street” side. Camping is done on the other side.
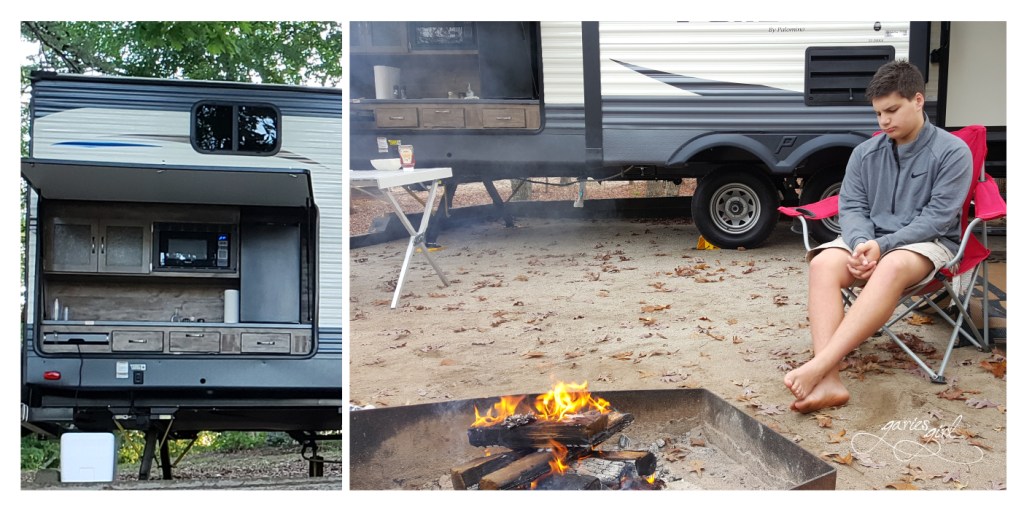
Out of all the features on the outside of our RV, the outdoor kitchen is one of our favorites. It truly is a second kitchen for us and if you plan properly, cuts down on trips in and out of the RV. This area includes a mini-fridge, microwave, induction cooktop, sink (with warm and cold water), a nice big counter and storage in the way of cabinets and drawers. This can easily be set up as a drinks station or used for preparing meals. Conveniently placed electrical outlets mean you can have a coffee station or an area for additional camping appliances, such as toasters or air fryers (I hear that is the newest camping must have).
Above the door is the awning and in that same area of the RV, the outdoor speakers. We like to listen to local radio stations (not too loud, don’t want to disturb our neighbors) or even stream music from our phones. This setup allows us to listen to it either inside the RV, just on the outside, or even in both areas.
The Inside of the RV
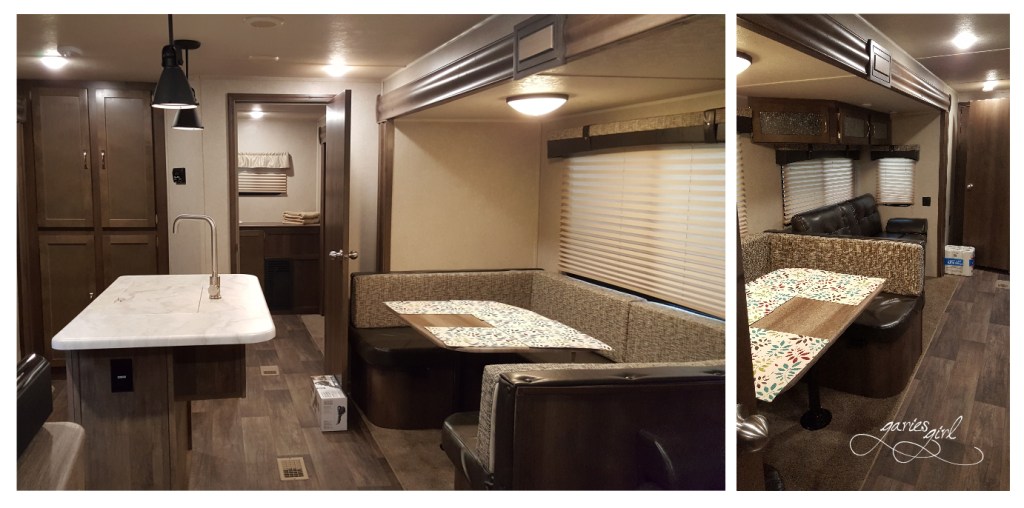
You enter the RV right into the main area. On your left is the kitchen, straight ahead is a U-shaped dinette and a separate couch. The kids’ room is all the way to the left, with the single bathroom and main bedroom to the right of the door.
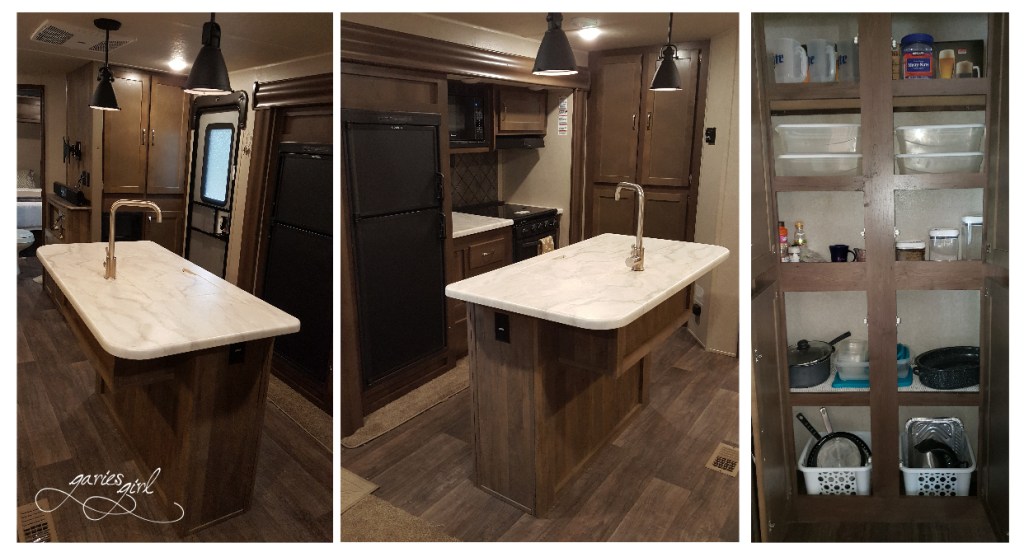
This model offers one of the best kitchen layouts out there. Everything is located together to the left of the entrance, with a refrigerator, some counter space, a stovetop and oven, pantry and best of all, a separate kitchen island with a double sink. This configuration means I can be in the kitchen and everyone else can move around the RV on the other side of the island and we are not in each other’s way. The pantry is HUGE and gives me more than enough storage for not only food, but appliances, additional dishware, and pots and pans. The refrigerator is not as big as the types you see in most homes but offers plenty of space to keep items cold or frozen while camping.
We use the dinette area quite often, if not necessarily for eating dinners. This past weekend it was a spot for morning coffee, a place to get some work done on the laptop, for the little kids to color and a great area for card games. It can also turn into a queen-size bed, which we used this weekend when Sidney came to spend one night. Of course, it also offers storage underneath the benches. One of the storage areas is also accessible from the outside.
The couch seats two people comfortably and is another great spot to read a book or watch some television. There is a spacious storage area underneath that is nicely hidden from the front. The couch does not recline, but we got some great storage ottomans that do double duty as footrests. Don’t worry, I wrote a whole separate post about the items we added to make it more functional – more on that later.
The couch faces the entertainment wall of the RV where we have a TV, sound system and DVD player. Below those, is an open shelf with another closed cabinet that provides additional storage. The TV is mounted using a swivel bracket, and when we do want to watch a movie together, we can position it so that everyone can see the TV.
The Bunk House
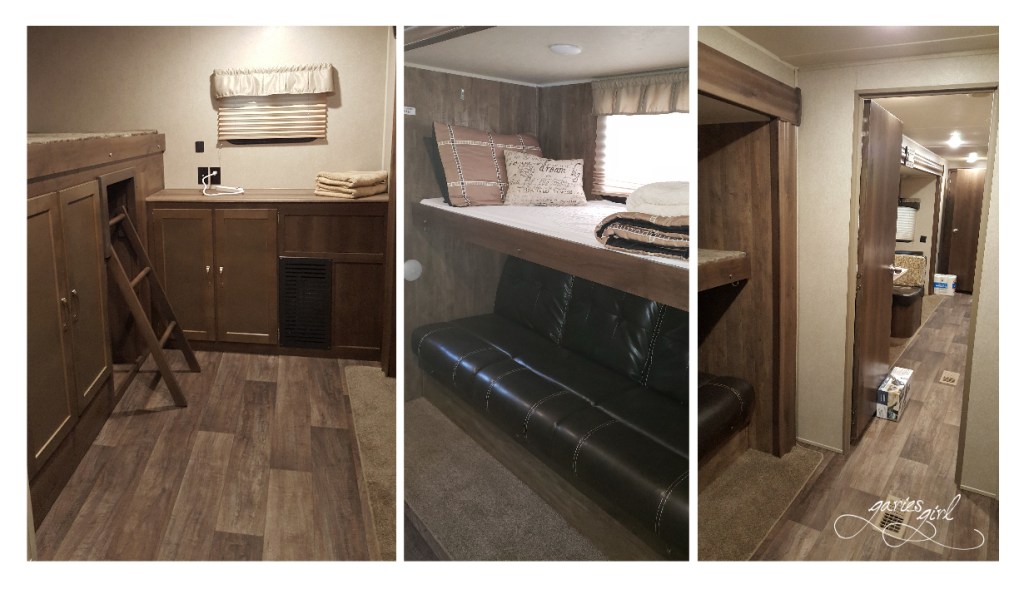
Towards the back of the area is a separate room for the kids. This worked out well when we just bought the RV and they didn’t mind sharing this area at all. There are two top bunks, both with individual lights and windows. Below is another two-seater couch, that offers storage underneath and can turn into another double bed. The top bunk can tuck away more if you are using the bottom couch/bed. We have closet storage under the left side bunk and another larger closet covers the back wall of the room. This one is counter height and with another electrical outlet right there, can be another entertainment area. When the kids are not camping with us, I like to use this area as a desk and can even close the door when I’m on work calls.
Main Bedroom and Bathroom
The main bedroom is located at the front of the RV and while most of the space is taken up by the queen-sized bed, you still have enough space to walk around the bed and access the closets and overhead storage areas. Windows on both sides can be opened and provide nice views and some fresh air if the weather allows. The bottom of the bed lifts up to reveal a large storage area where I now keep our extra bedding.

There is a sliding door between the bedroom and bathroom, which also has a door going into the main living area. While not huge, this bathroom offers plenty of space for the things you need to do in a bathroom. The corner shower is great when you don’t want to use the public facilities to shower and of course, there is a sink and toilet as well. No need to go into more detail here, lol.
That covers the outside and inside of our RV – I hope you enjoyed reading about it or listening to Pieter! He is such a trooper for doing these videos!
Don’t miss my post about the initial setup of our RV and all the items we needed for that first camping trip!

0 thoughts